Saturday, 22 March 2014

Four Tricks for Cleaning Water.

            Today’s blog will be a short one, but it will cover a couple of useful and interrelated ideas, all to do with water.

            If you find a source of water, the chances are that it will not be too clean. All sorts of mud, dirt and grit may be floating in it and the organic components will affect the efficiency of chemical purification methods you may employ.

            One solution is to use a cloth bag to filter the water through. I have even seen it suggested to use a spare pair of trousers. Tuck one leg into the other to form a double layer and then tie a knot in end of the leg(s). Hang this up and pour water through so that it drips into a container. In a long term camp the filter can be packed with sand and straw etc. Note that the water produced will be clearer, but cannot be considered to be safe until it has been boiled or chemically treated.

            A variation of the above is the wick method. Fill a container with your crude, suspect water and place and empty container lower down. Connect the two with a strip of cloth such as a bandanna and allow capillary action to do its thing. This may work with other materials such as paper or string. Experiment. This method is a lot more economical on materials. When your wick becomes too dirty wash it or discard it. Note that while the water produced will appear clearer it cannot be considered to be safe until it has been boiled or chemically treated.


            A third method I was taught to call an indian well. We have all seen the movies when the protagonists get to a water hole and it is all muddy. “Oh no!” they cry. What they should do is start digging a hole near the shore of the waterhole or river. If the ground is too hard for your hands find an object you can use as a digging stick. A tent peg, tire iron, even a stick! The hole should be about half a metre across and deep. Since you have dug down into damp ground the hole will begin to fill with water. Poke a few holes in the side of the hole and it will fill even quicker. The water will probably look muddy and still something you do not want to drink. Using your hands, a bark scoop, tin can or anything else you have handy bail out the water and cast it onto the ground nearby. Eventually the water coming through should become clearer. Leave it a while and more material will settle out. The water will still need to be filtered further and boiled or treated. This is not the fastest method of getting cleaner water but does have the advantage that you can use it when not near an obvious water source. Just dig down into damp ground. Obviously, digging at a low point will be more productive than a hilltop.

            Our fourth method is useful for sunnier locations such as the desert, but may work elsewhere. Take two bottles, glass or plastic. Clear is good but if both are opaque use the darker coloured one for the “crude” water. Partially fill one bottle with untreated water and tape the necks of the two bottles together. Since we are in the desert we will assume you have a vehicle nearby (working or not) and it has some tape in the tool kit. (don’t go to places like the desert without a tool kit and other essentials in your vehicle!). If you have a suitable tube use this to connect the two bottles rather than taping them neck to neck. Find a slope or pile of sand, Select the side that will get the most exposure to the sun (the south in the northern hemisphere). If the bottles were taped directly together lay the two bottles on their sides and bury the empty one in the side of the slope, leaving the one with water exposed to the sun. Let nature take its course. The water in the outside bottle will be heated and evaporate. Being in a closed system it will pass into the interior of the buried bottle and the drop in temperature will cause it to condense. After a while the buried bottle will contain drinkable water which can be collected if you take the apparatus to pieces carefully. If you had a suitable tube you could have run this into the collection bottle when you constructed the device. If you paid attention in school you will recognise this method as distillation without the need for bunsens and heatproof glassware. The source water you used could have been urine and the produced water would still be safe to drink.


         If you have enjoyed this article or it has been helpful to you please feel free to show your appreciation. Thank you.
The Books

http://www.angelfire.com/art/enchanter/epsdbook.html
http://www.lulu.com/shop/http://www.lulu.com/shop/phil-west/survival-weapons-optimizing-your-arsenal/paperback/product-21488758.html
http://www.lulu.com/shop/phil-west/crash-combat/paperback/product-22603842.html
https://www.amazon.com/Anatopismo-Underrealm-Novella-Phil-West-ebook/dp/B077G7MMFM

Friday, 21 March 2014

Self-defence on the Toilet

            Today, as I still lay asleep, my dreaming mind decided to consider what today’s blog would be about. It considered several topics, which in the manner of dreams mingled and interwove. These resolved into two articles, both part written as I travelled into work. All that was needed was to write them down and decide which was more suitable for a Friday blog. Regular readers will know that I often elect to make Friday’s blog a little different. Usually it is something humorous, and failing that something a little off-topic that may still entertain or provoke thought. I had decided to post the more off-topic of the two possible articles. Then I looked at my emails and a link a friend had sent me and I knew that I had Friday’s blog topic.
 
 
            In Spider Robinson’s book “Callahan’s Crazy Crosstime Bar” an alien character is asked what he finds most remarkable about living on Earth. His answer, to the surprise of everyone else, is “bathrooms”. He then gives a long list of reasons for his statement. On point I recall is that he asks why people waste so much time running hot and cold taps to get the desired temperature when a cheap electronic addition could do this? I have discussed on this blog that we frequently use hot water in the bathroom when we do not need it.

            Years ago the friend who sent me today’s link and myself got into a long discussion on illogical aspects of bathrooms. I seem to recall that one topic was the shape of toilet bowls. Why is the back of them gently sloped? If the rear part was more vertical, or even receding towards the bottom this part would be less prone to fouling. The horse-shoe shaped toilet seats used in some public institutions are more hygienic than the more common horse-collar shaped seats, being less prone to drips of urine from a seated user.

            Another of my Friday blogs has semi-humorously mentioned the topic of self-defence in the bathroom. It is a place with just one way in or out in which you may be naked or partially dressed. Is it that outlandish to have some means of defence in that room against an intruder? I watched a movie the other week where the female protagonist survives and encounter with two psychopathic serial killers. Unlike most movies of this ilk, the heroine realizes one or both of these men may come after her and makes preparations. We see her moving around her home. There is a knife taped under the counter top, a stout stick in the umbrella stand and in her shower is a screwdriver in the cup with her toothbrush.

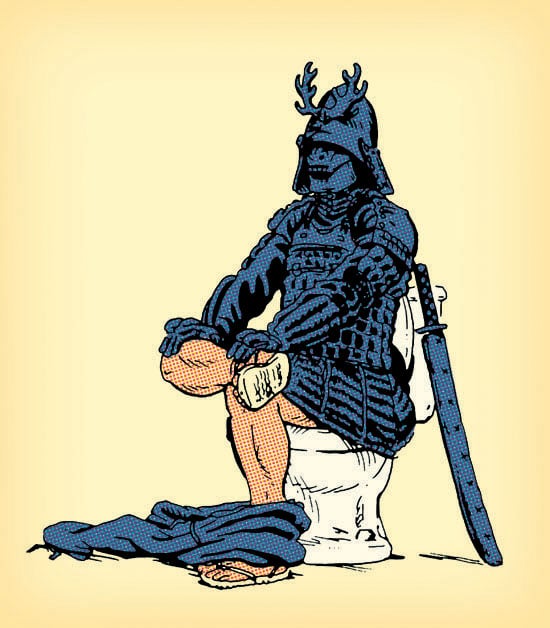
            Possibly the most interesting point in the “Poop like a Samurai” article is how the master also considered this posture to be better for evacuation. I have yet to try it but it did remind me of the works of Alexander Kira. Kira was an advocate of the modified squat position. There are various companies and individuals that will sell you gizmos to make your toilet more like squatting over a hole, but these are not really necessary. Just rest your toes on the floor and lean forward so your elbows are on your knees.(middle right, below) It really does make things easier.

         If you have enjoyed this article or it has been helpful to you please feel free to show your appreciation. Thank you.
The Books

http://www.angelfire.com/art/enchanter/epsdbook.html
http://www.lulu.com/shop/http://www.lulu.com/shop/phil-west/survival-weapons-optimizing-your-arsenal/paperback/product-21488758.html
http://www.lulu.com/shop/phil-west/crash-combat/paperback/product-22603842.html
https://www.amazon.com/Anatopismo-Underrealm-Novella-Phil-West-ebook/dp/B077G7MMFM

Wednesday, 19 March 2014

The Step-Across Sacrifice Throw.


                A friend of mine posted this image up on his facebook page. Apparently if someone grabs your wrists you should break your own tailbone and the assailant will laugh so hard he will hit his head against the convenient nearby wall.

  
          There are a lot of simpler and far more effective things you can do against a wrist grab like this. Most of these are detailed in my book, so I will not repeat them here. A technique that the above illustration does remind me of is one of my favourite sacrifice throws.

            A sacrifice throw is a technique that takes you down to the ground as well as you adversary. As such, it is not the best choice if you are facing a mob of people who may be tempted to kick you if you are so cooperative to lay down near their feet. For a one to one encounter this can, however, be a useful trick to add to your toolbox.

            This is a very simple technique and is somewhat easier to initiate than the better known Stomach throw (Tomoe nage). There is doubtless a Japanese term for this throw but it is easier to just think of it as the Step-Across Sacrifice Throw.

            Firstly, you must have some kind of connection to your foe. Grab his shirt or he has grabbed you lapels. Hook your hands around the back of his neck. If he has your wrists as in the illustration above hook your hands outward so you do not lose contact. If your foe should release your wrists as you execute your technique you will end up on the floor with him standing over you, which is embarrassing to say the least!

            Step your right foot over to the outside of his right foot (or left foot to beyond his left). The result is one of your legs crossed over the front of both of his.

            Drop to the floor. You can sit down on your rear heel, drop down on one knee or just fall down, whatever suits you and the situation. The important thing is you remain in contact and the foe has to suddenly handle your entire dead weight. Executed correctly this will pull him forward, but he cannot step forward to compensate because your front leg or body is obstructing his legs. The foe is pitched forward, head first. The photo below shows a variant of this using a drop to the knee and disrupting the foe's balance to throw him to the side. The mechanisms and techniques behind this are covered in my book.

            If his arms are free he may be able to arrest his fall. If he has the training and quick wits he may manage a forward breakfall or roll. Be prepared for this by regaining your feet as soon as the throw has been made so you can maintain the initiative and counter attack.

            In training, be careful with this technique since it will throw a partner headfirst and they may be injured if their breakfall technique is not good. I don’t know if this throw is legal in competitions. Best consult the judges beforehand.

            For information on practical self-defence techniques please by a copy of Attack, Avoid, Survive: Essential Principles of Self Defence.
         If you have enjoyed this article or it has been helpful to you please feel free to show your appreciation. Thank you.
The Books

http://www.angelfire.com/art/enchanter/epsdbook.html
http://www.lulu.com/shop/http://www.lulu.com/shop/phil-west/survival-weapons-optimizing-your-arsenal/paperback/product-21488758.html
http://www.lulu.com/shop/phil-west/crash-combat/paperback/product-22603842.html
https://www.amazon.com/Anatopismo-Underrealm-Novella-Phil-West-ebook/dp/B077G7MMFM

Tuesday, 18 March 2014

Jiu-Jitsu Shoulder Pinches and the Brachial Plexus


            As I have mentioned recently, I am currently reading the Pellucidar novels of Edgar Rice Burroughs. Often the protagonists prevail against their caveman enemies by their “outer crust” knowledge of boxing or jiu jitsu. Consequently this has got me interested in again reading some of the older jiu jitsu manuals that I have available.

One of the oldest I have come across is from 1904. The two Japanese fighters demonstrating the techniques do not look like they are much taller than five foot. What would they make of modern Japanese, I wonder?

The book has some interesting techniques, most of which will be familiar to modern students of martial arts. A couple of techniques can be criticised as being overly elaborate, although that can be said of many manuals. Just because a book shows a thing as possible does not mean it is the best solution. It may be there for illustrative purposes of basic principles, for example. This particular book can be praised for often avoiding complicated throwing techniques when simple strikes can produce the desired result. I do not recall any kicks being used in this book, the strikes used being the knife-hand, the elbow and a two-finger jab directed against the solar plexus.

A section of the book that struck me in particular was on the various uses of “the shoulder pinch”. We get told that pressing into this point with the thumb or fingertips is a good way to make someone release a hold, move them aside when they are obstructing you and various other applications to induce compliance. The one photograph that purports to show the shoulder pinch does not show its location with sufficient clarity. The recipient’s head prevents me seeing where the thumb is being applied. The text tells us:-

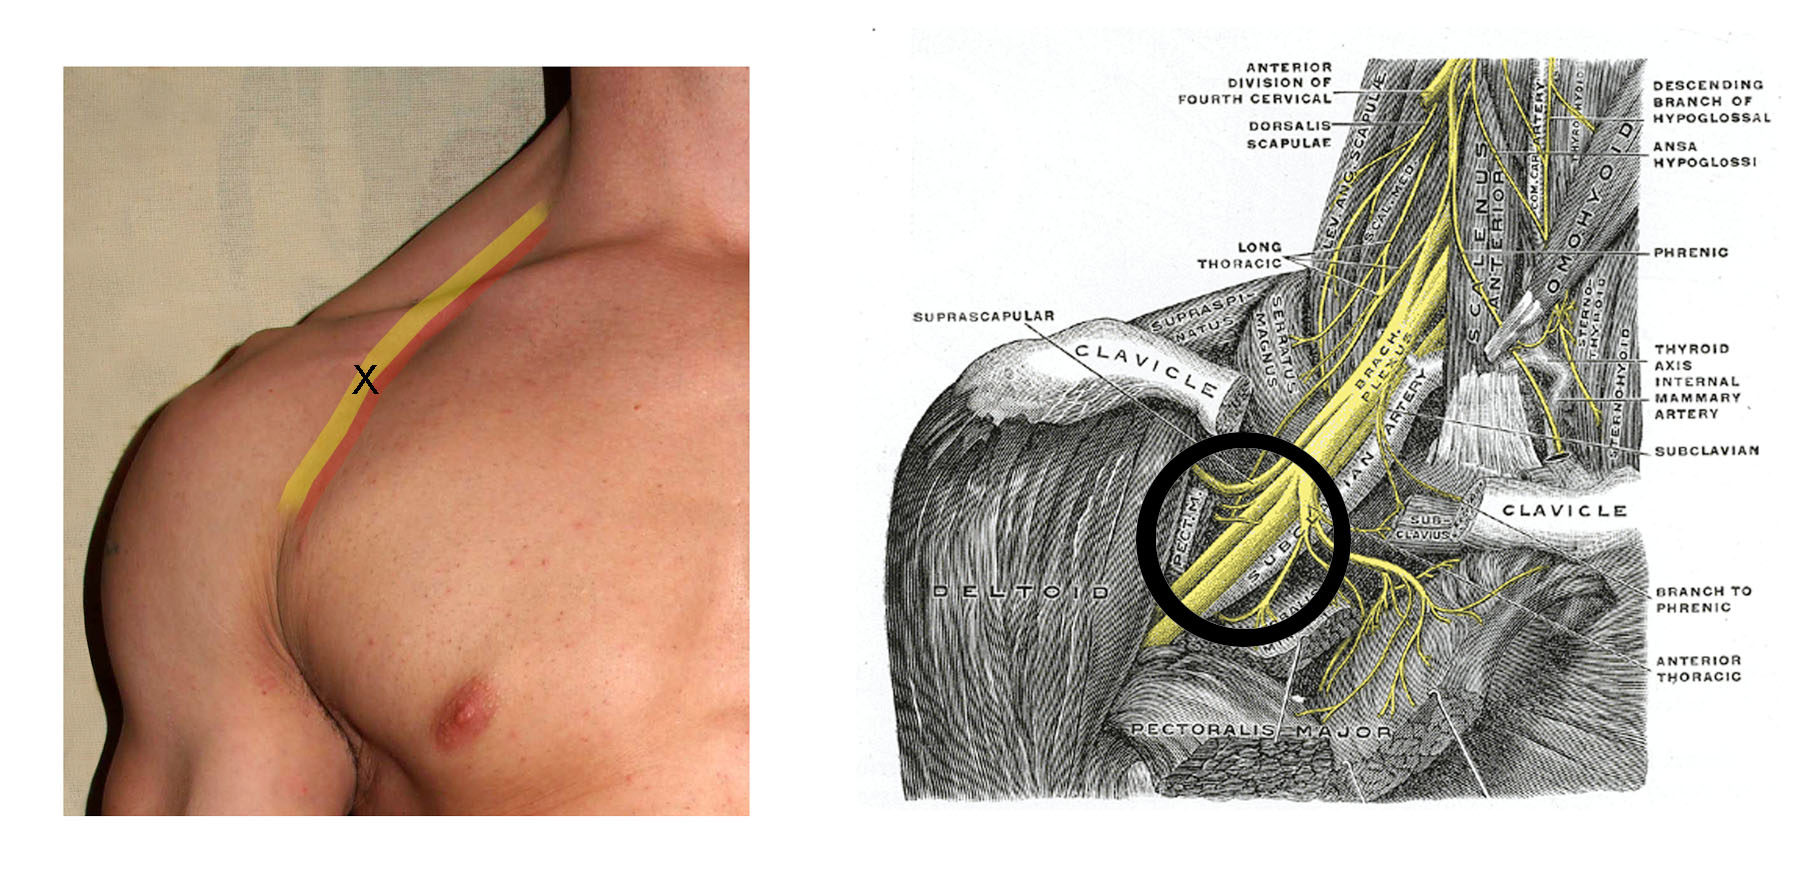
The thumb is pressed into the front side of the top of the shoulder, while the grip is kept by grasping with the fingers at the back of the shoulder. A very little practice upon his own shoulder will show a jiu-jitsian just where the spot is that is hyper-sensitive to the pinch with the thumb. Bear in mind that the ball of the thumb should dig in at the point where the head of the upper arm joins the scapula.”

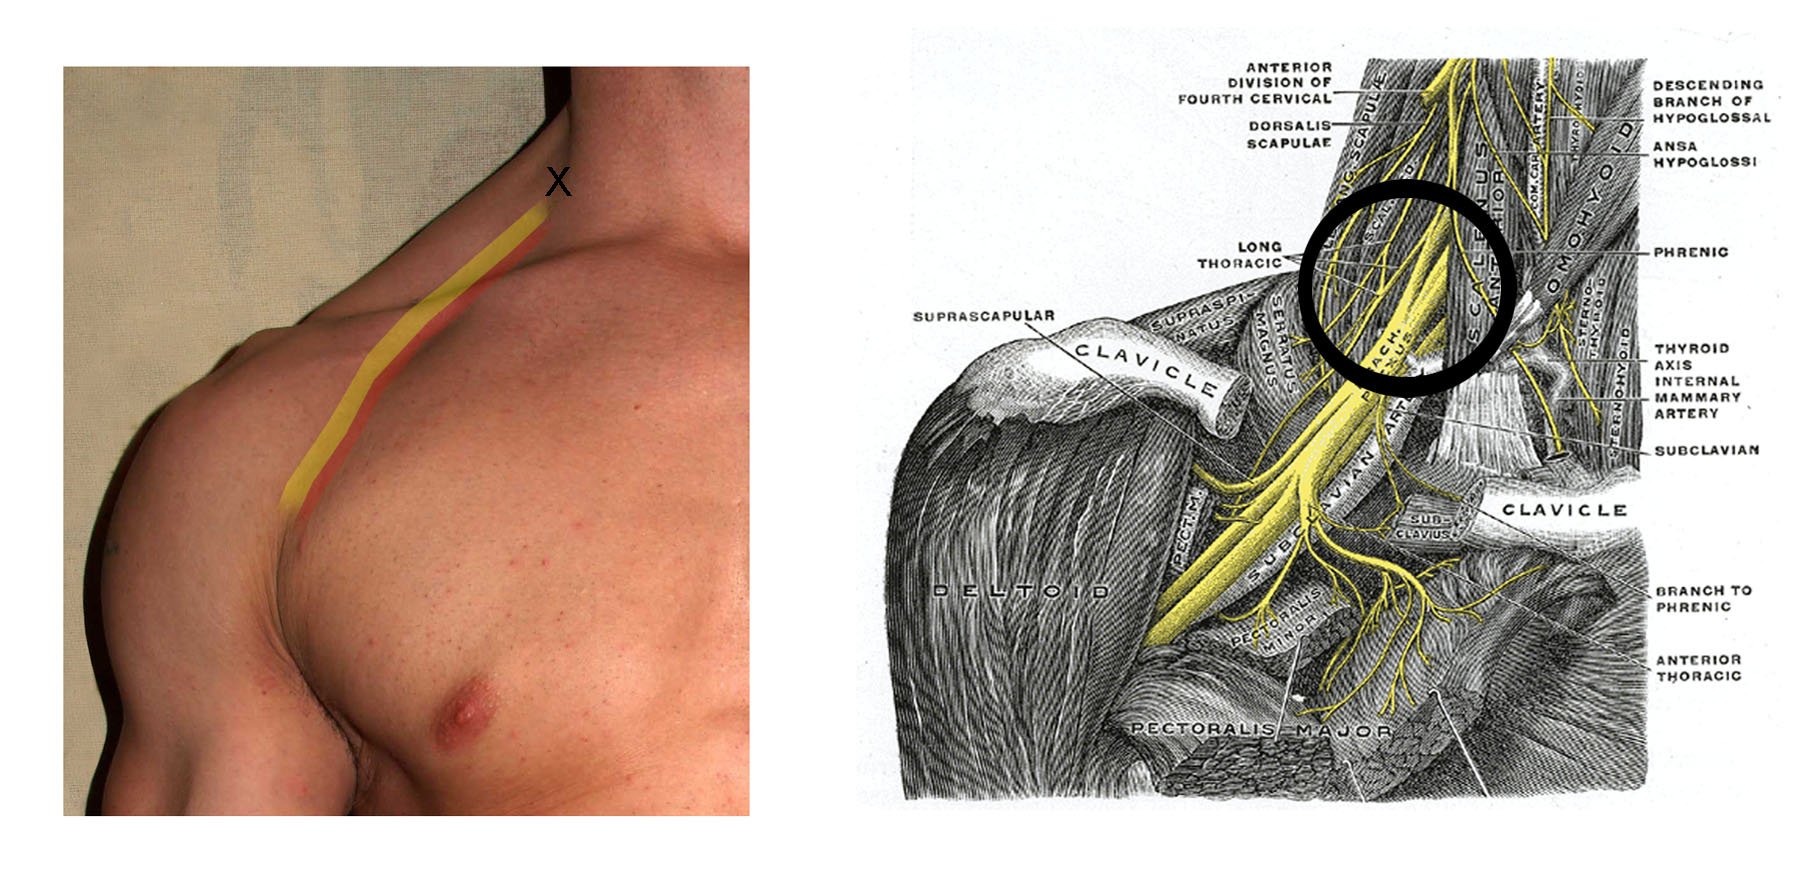
             I would have assumed that the “shoulder pinch” was against the brachial plexus but the last sentence suggests a more peripheral location. The brachial plexus is quite an effective location to apply a thumb or fingertip to. The nerves from the plexus continue into the arm and can also be pressed upon closer to the shoulder joint if you use deep pressure. It is possible the author considered both locations to be “the shoulder pinch”.

            The brachial plexus is pretty easy to locate. Just search around where the neck forms a corner where it joins the trapezius muscle. The anatomical diagrams should hopefully make this clear.
            The brachial plexus is also a good target for strikes such as the knife-hand, hammer-fist and forearm. You have probably heard of the “brachial stun” technique that has become well-known in recent years. Often the technique shown in videos is a strike to the side of the neck. A strike to the actual brachial plexus will have similar effects and this point is often easier to hit during combat than the side of the neck.

            Like any strike to a major nerve centre, this can be potentially very damaging so do not attempt this except in a real self defence situation.
         If you have enjoyed this article or it has been helpful to you please feel free to show your appreciation. Thank you.
The Books

http://www.angelfire.com/art/enchanter/epsdbook.html
http://www.lulu.com/shop/http://www.lulu.com/shop/phil-west/survival-weapons-optimizing-your-arsenal/paperback/product-21488758.html
http://www.lulu.com/shop/phil-west/crash-combat/paperback/product-22603842.html
https://www.amazon.com/Anatopismo-Underrealm-Novella-Phil-West-ebook/dp/B077G7MMFM