Sunday 28 January 2018

Morse Code

I touched on the topic of Morse Code in the last post. I learnt AMA in under a day and Cykey coding in less than an hour. Could I memorize Morse? Here is how I approached the task.

Firstly, learn the letters as sounds. Use your phonetic alphabet and say the Morse after the letter. “Whiskey: dot, dash, dash” or “Quebec: dah, dah, dit, dah”.

Most of you will already know one bit of Morse. SOS is three dots, three dashes and three dots.

Learn the vowels first. Alpha is a simple dot-dash. Echo is the most used letter in English so is a single dot. India is two dots, like a pair of eyes. Oscar you already know from SOS. It is three dashes. Uniform is two dots and a dash.

Each of these vowels have a Morse character that is either their reverse or their inverse.

Alpha written backward is November, dash-dot. A and N form the word “An”. You cannot write Echo backwards but you can swap the dot for a dash. A single dash is Tango. E and T go together as in “ET phone home”. The inverse of India is Mike, two dashes. I and M form the abreviations “I’m” or “’im”. The inverse of Oscar is three dots, which is Sierra which you already know from SOS. Uniform backwards gives us Delta dash-dot-dot. D and U form “du”, a phonetic rendering of “do”. Or you could think of depleted uranium.

To the above we will slip in another letter you may already know. “V for Victory”, three dots and a dash you may have seen in old war films. The reverse of this is the Morse code for Bravo. B and V sound similar.

You have just learnt twelve letters in Morse code! That is nearly half the alphabet and includes some of the most commonly used letters. You can create many messages with just these.

Next, learn some simple words that use other characters. I learnt my name which gave me the codes for Papa, Hotel and Lima. The code for Lima reversed gives me that for Foxtrot. I associate this pairing by thinking Lima sounds like an animal and Foxtrot that it sounds like something to do with animals.

There are various ways to learn the other characters. Charlie is memorable because it seems odd it is so long. Dash-dot-dash-dot. Quebec, dash-dash-dot-dash also sticks in my mind. The reverse of Quebec is the code for Yankee. Associate this pairing by thinking both “Q” and “Why” can be questions.

The chart below is a visual representation of Morse code. You will see a number of different versions of this. I like this one since it reproduces the codes in a linear fashion beneath each character, avoiding misreading the graphic. This chart will help you remember some characters. Kilo is dash-dot-dash. “K” and “R” look similar and Romeo is the inverse of Kilo, dot-dash-dot.

Another chart, sometimes called a Morse Tree or dichotonic key. You will encounter different versions of these and some put “dash/ dah” on the other side, so look carefully. This key is mainly of use in translating from Morse. It helps me remember that Juliet is one dash more than Whiskey. The reverse of Whiskey is Golf. Golf and Whiskey are associated, or you can think of G and W paired as in “Gross Weight” or “Games Workshop”.

Some letters I remember by breaking them up into smaller letters. X-ray is dash-dot-dot-dash so I remember it as “NA”. Zulu is dash-dash-dot-dot so “MI”.

Memorizing the Morse code is not the same as being proficient or fluent in it, of course. An emergency situation is not a time for tests of memory if you can help it. Therefore I suggest you include backups.

I have a small wallet that holds credit cards, membership cards and the like. For years it has carried a laminated card I made with Morse code on. Many of you will recognize the book I photocopied the original from (Note misprint of numbers! All numbers have five elements). It is folded just above “Sending Signals” so that the alphabet is on one side of the card and the signals on the other.

For larger kits I suggest you consider a suitably sized rendition of the chart below. I have modified this so that the linear form of the codes is below each character.
         If you have enjoyed this article or it has been helpful to you please feel free to show your appreciation. Thank you.
The Books

http://www.angelfire.com/art/enchanter/epsdbook.html
http://www.lulu.com/shop/http://www.lulu.com/shop/phil-west/survival-weapons-optimizing-your-arsenal/paperback/product-21488758.html
http://www.lulu.com/shop/phil-west/crash-combat/paperback/product-22603842.html
https://www.amazon.com/Anatopismo-Underrealm-Novella-Phil-West-ebook/dp/B077G7MMFM

Friday 26 January 2018

Binary Tap Code

In the movie “Ship Ahoy” Eleanor Powell’s character tap dances as message in Morse code. In real life, Vietnam POW Jeremiah Denton informed the world that prisoners were being tortured by blinking out the word “TORTURE” in Morse code.


I cannot be denied that Morse code is useful. It is not the easiest system to master, however. Another code used by POWs was the tap code, sometimes known as the 5 by 5 tap code. This code relies on creating or visualizing a 5 x 5 table of letters. C and K are treated as the same letter. The position of the desired letter in the matrix is identified by two sequences of between one and five knocks. For the first set of knocks you count down the rows of the matrix. For the second set you count across the columns. Three knocks in the first sequence would have you count down to “L”. Four following knocks would have you count across and end on “O”. 3-4 is therefore “O”. A disadvantage of this code is that more than half the alphabet requires six or more knocks. Common letters such as U and Y need nine!

An idea that occurs to me is to combine some elements of Morse and the tap code. To do this the references for the letters are converted into binary, using “dits” for zeros and “dahs” for ones. A number value up to seven can be represented by a three-figure binary number. The location of any letter on the tap code matrix can therefor be represented by six figures or six taps. That all letters are the same length may be useful for some applications such as binary one-use pads. Since “O” is 3-4 it can be represented as 011-100 or dit-dash-dash-dash-dit-dit. A dash means to move down a row or across a column, a dit to stay. The binary system also allows us to distinguish “K”. Logically this is to the right of “J” so 010-110. The binary referenced table potentially has 49 character positions, 64 if the zero rows and columns are included. Numerals zero to five would be 000-000 to 000-101. Six to nine would be 001-000, 010-000, 011-000 to 100-000. This is similar to the hand signals for numerals six to nine.

SOS would be 100-011, 011-100, 100-011, so the Morse code ...---... is easier to retain. In binary tap code this effectively 3-7-3. None of the standard letters use 7 so seven on its own could be used as a distress or “!”.


         If you have enjoyed this article or it has been helpful to you please feel free to show your appreciation. Thank you.
The Books

http://www.angelfire.com/art/enchanter/epsdbook.html
http://www.lulu.com/shop/http://www.lulu.com/shop/phil-west/survival-weapons-optimizing-your-arsenal/paperback/product-21488758.html
http://www.lulu.com/shop/phil-west/crash-combat/paperback/product-22603842.html
https://www.amazon.com/Anatopismo-Underrealm-Novella-Phil-West-ebook/dp/B077G7MMFM

Universal Lever Lock Pick.

Most of my lock picking has been geared towards cylinder pin locks. The same skills can also be applied to wafer locks. There are, of course, many other types of lock mechanism. Warded locks were discussed in a previous post.

A lock mechanism I often see on the television is that of lever lock or some other design that uses this form of key:
Sometimes this is because the program is set in the past, or set in an old location. Often the lock is for a jail cell in some “developing” nation. My beloved Bogotas are of very little use against such a lock! Naturally I am curious as to how such locks can be dealt with.

The other day I encountered Houdini’s book “Handcuff Secrets”. Despite the title, he covers many other topics and it is an interesting read. One particular item he shows (p.71) is the ingenious device shown below, constructed from two pieces of steel and some brass tube.

         If you have enjoyed this article or it has been helpful to you please feel free to show your appreciation. Thank you.
The Books

http://www.angelfire.com/art/enchanter/epsdbook.html
http://www.lulu.com/shop/http://www.lulu.com/shop/phil-west/survival-weapons-optimizing-your-arsenal/paperback/product-21488758.html
http://www.lulu.com/shop/phil-west/crash-combat/paperback/product-22603842.html
https://www.amazon.com/Anatopismo-Underrealm-Novella-Phil-West-ebook/dp/B077G7MMFM

Sunday 21 January 2018

More on Finger Spelling

The recent posts on American Manual Alphabet made me recall something many decades past. A summer long past at primary school when I had become interested in codes and cyphers. One of the books in my possession back then was “The KnowHow Book of Spycraft”. Recently I have been reading the “The Official CIA manual on Trickery and Deception” and realize many of the ideas in the children’s book are more practical than you might expect. Supposedly Soviet spy Oleg Gordievsky, testified that th KnowHow book gave away the KGB’s tradecraft.

When I look at the tracks of a bicycle in the snow and estimate its speed, it is something I learnt from the KnowHow Book of Spycraft. Even today this book and the related “Usborne Spy’s Guidebook” are well worth a flick through, especially if you want to inspire a youngster to noticing more than their phone.

The reason I recalled this book is that it contained the following page:

The system is less like British Finger Spelling than I had thought. Some of the single-handed signals have potential as useful supplements to the AMA symbols we have already learnt. For example, “Echo”, “Foxtrot”, “Mike”, “November” and possibly “Uniform” will all be clearer over a greater distance than standard AMA signs. “Juliet” can be made with less hand movement, although I would suggest this is always made with the four fingers raised to distinguish it from the standard “Lema” gesture.
         If you have enjoyed this article or it has been helpful to you please feel free to show your appreciation. Thank you.
The Books

http://www.angelfire.com/art/enchanter/epsdbook.html
http://www.lulu.com/shop/http://www.lulu.com/shop/phil-west/survival-weapons-optimizing-your-arsenal/paperback/product-21488758.html
http://www.lulu.com/shop/phil-west/crash-combat/paperback/product-22603842.html
https://www.amazon.com/Anatopismo-Underrealm-Novella-Phil-West-ebook/dp/B077G7MMFM

Sunday 14 January 2018

Tension Tools

Version 1.1
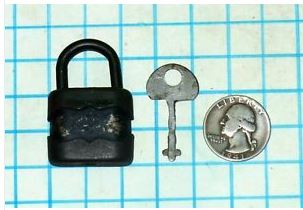
Some time ago there was a knock on my door. A female student accompanied by a member of staff. The young lady had locked her keys in her locker. Could I do something? Ironically I had been having a sneaky read of some lock picking ebooks when I was disturbed. I have access to three sets of bolt cutters in that building but the issue was not could I do something, but should I? I pointed out that I could not open a locker unless I had proof it was her locker. Who had allocated her the locker? The answer was the person who would have been my first port of call for the bolt-cutters. I pointed out that he may not be in his room, selfishly enjoying his well-earned lunch break.

Dully, the student muttered something about could I give her a clip to open the lock with.

“Do you mean a paper clip?”

Bovine grunt to the affirmative. Ironically I have just about everything in that room except decent springy paperclips!

“You can’t pick a lock with a clip. You need a tension tool too” I told her.

One might think, given that this is supposedly a future scientist, that “What is a tension tool?” might have been a likely response, with possibly, “Do you have a tension tool?” or “How do I get a tension tool?”

A further grunt about clips and she wandered off with the member of staff to find a paperclip. I have no idea how much time she wasted trying to pick the lock without a tensioner.

Picking is all about the correct application of tension. It doesn’t matter if you are single-pin picking, raking, using a pick gun or an electric pick, you still need a tension tool. One of the most common mistakes about picking that you see in the movies is a character using a pick or pick gun and no tension tool. This is like a horse-riding scene without the horse.

Admittedly, tension tools are the less glamorous half of the double act. In many kits you get dozens of varied pick designs but just a couple of tension tools, almost like they are thrown in as an afterthought. Picks show considerable variety, while tension tools often seem to be bent bits of metal, often home-made.

As you become more experienced you begin to appreciate that the tensioner and how you apply it is critical in whether a lock opens easily or not at all. The proportion of tensioners to picks in your kit will begin to shift, particularly when you realise you only use a small proportion of your available picks for most tasks.

Tension tools are commonly called “tension wrenches”, although some pickers object to the term “wrench”. It can also be argued that what pickers call “tension” is more strictly “torque”, so the term “turning tool” is used as well. That said, web-searching “tension wrench” will give you more hits relevant to lock picking than “torque wrench”.

Trying to acquire more tension tools can be frustrating! Some companies will only sell you turning tools as part of a larger set or with a pick kit. When you can buy individual items many companies do not bother to list the width and thickness of the tools. Also crossing the Atlantic tends to at least double the price! Not surprisingly, many pickers tend to “roll their own”. Turning tools are easy to make or modify. Tolerances are broad and tools are not subjected to strong forces.

If you do make your own, the dimensions given for the Southern Specialities 2500 set may prove useful. BosnianBill’s article on tension tools provides some useful photos of tools alongside steel rules.

Red .030” thick .50" leg, .125" wide and 3" long; .25" leg, .094" wide and 3" long

White .040” thick .50" leg, .125" wide and 3" long; .25" leg, .094" wide and 3" long.

Blue .050” thick .50" leg, .125" wide and 3" long; .25" leg, .094" wide and 3" long


Finding materials to make your own tools can be problematic. The “steel wiper blade inserts” usually recommended are not as easy to find in some areas as others. You take pot luck at what you can find, and as was seen in my account here, thicknesses of material can be significant. It would be nice if more retailers sold raw materials for making tools. There are other options. Some pickers make tension tools by bending the tips of screwdrivers.

You will encounter the terminology TOK and BOK. American locks are usually mounted pins upwards so turning tools that are applied to the pin side of a keyway have become known as “top of keyway” (TOK) tools and the alternative “bottom of keyway” (BOK). In Europe it is common for locks to be mounted either way up, so these terms can be a little confusing. TOK is often used as a term for prybar-type turning tools and BOK for other tools. In reality some prybars may be applied to the bottom/ outside of a keyway and a narrow headed BOK tool might be used on the top/ inner side of a keyway. TOK tools tend to be used at the 12 and 6 o’clock positions, BOK at more oblique angles. Alternate terminology is “centre of plug” and “edge of plug”.

Typical “L-shaped” “BOK” turning tools. These are both 3mm/ 0.12" wide, which could be considered to be the standard width. The longer one has a twist handle and is from a set of five tools that is widely available on ebay. They take ages to come but cost very little and were surprisingly nicely finished. Their price makes them a good source of materials for customization or creating your own tools. The shorter tool is from my Serenity kit and is probably the tensioner that I use the most. I plan to bend the end into another, narrower head.
Generally turning tools are used with very light pressure so do not need to be very long. A tool such as the longer one above could easily be cut and made into an additional tool. I will keep this tool as it is just in case I ever need a long tool. It could easily be bent into a shape that can be used on a tulip lock, for example. Keyways are very useful for bending and improvising tools. Second from the right is one of the tools supplied with my larger Chinese pick set. It is narrower and noticeably thinner than the two to the left but still useful. It could also be cut to make a second tool or bent to make a Z-tool. Rightmost tool is made from a pen clip. Unusual in that it required some unbending rather than bending. The shoulders and head could be filed down if desired, and the other end could also be made into a head for a Z-tool. This nicely illustrates that a turning tool need not be that long. Update: I have since seen it suggested that longer turning tools provide greater feedback, which is logical.
Tulip turning tools are used for locks recessed into doorknobs. This is obviously an application where length has advantages.
Two home-made Z-tools. The one on the left is made from a laboratory spatula. This was intended as a wide turning tool so was left at its original 4 mm width. It could easily be filed down to standard or narrow width. The keyway of a padlock was used to bend the ends. The next tool was made from a windscreen wiper insert and was seen in my article here. The short end has been filed down to 2.5 mm and the shank and shoulders suitably filed and tapered (shown below). This is used in small locks but can also be used TOK. The result is a versatile tool that can be constructed in just a few minutes. Ideally I would have a set of these in different thicknesses, complimented by the larger tool. 
The middle tool is the standard-width tool from my larger Chinese kit. Next to it is another tool made from a pen clip, but not yet filed to final dimensions. The leftmost tool is the same design as that which comes in the Goso hook kit, and one of the most useful parts of that kit. This tool also comes with the five-part tension tool kit mentioned earlier.

Flat Z-tools. These came with the five-part tension tool kit. Unlike many Chinese-made picks the turning tools are competently finished and seem serviceable. One is thicker than the other two. I don’t use these a lot but they work well enough and I have even had some TOK successes with them! It is a shape worth bearing in mind if you are improvising turning tools.
On the right is the prybar tool from my Serenity kit. Prybar and TOK tensioners are favoured by many pickers who are far more experienced than myself. I find I have trouble with them popping out of locks. These are often used for picking with TOK, which I often cannot get to work, perhaps because I usually rake locks. Part of the problem may be the Serenity prybar appears to be under 1 mm thick, probably 0.8 mm, so not suited to some of the wider keyways I have on some locks. It works with my narrow SKS lock. Ideally you also want prybars made from 1mm/ 0.04" or 1.2mm/ 0.05" thick material. Many retailers do not bother to list the thickness of prybars, so you may encounter thinner examples.

Y-shaped turning tools are used for certain styles of car lockway. Many of these have shutters and wafers on either side. Sometimes called “wishbone” tools. 


Lock picking is generally about “less force, more finesse”. If it is not working the solution is usually a gentler touch on the pick, rake or tensioner. Spring tensioners reduce the tendency to apply too much torque. By the time I tried using a spring tool I had already developed the habit of a light touch and had to use more pressure on it than I was accustomed to! Springs seem to work but you should learn to use more conventional tensioners if you are to be proficient with improvised devices.
My experience with turning tools made from hairpins has been mixed. The best results have been with tools constructed to be at a vertical angle to the lock, like a prybar. Bend the end over so it acts as a wider, flatter beak that cannot turn. Wider keyways will need additional modification. You will probably find hairpins too wide to be used as picks on some locks. The challenge is bending them in the right direction.
 
         If you have enjoyed this article or it has been helpful to you please feel free to show your appreciation. Thank you.
The Books

http://www.angelfire.com/art/enchanter/epsdbook.html
http://www.lulu.com/shop/http://www.lulu.com/shop/phil-west/survival-weapons-optimizing-your-arsenal/paperback/product-21488758.html
http://www.lulu.com/shop/phil-west/crash-combat/paperback/product-22603842.html
https://www.amazon.com/Anatopismo-Underrealm-Novella-Phil-West-ebook/dp/B077G7MMFM

Friday 12 January 2018

Luggage Locks and Skeleton Keys

Warded locks are very simple devices. At the far end of the lock is a catch or spring. Rotation of the end of the key releases this. Between this mechanism and the keyhole is a space with a number of cross-walls or “wards”. The key cannot turn unless its cut-out sections coincide with the position of the wards. With a little forethought keys can be designed that will only open certain locks in a house, but not others. The downside is that warded locks only really prevent the use of other keys. If most of the excess metal of a key is removed the result is a key that can open a warded lock irrespective of the pattern of wards. This is the original meaning of “skeleton key”. Items such as screwdrivers might be modified to open some locks.


Warded mechanisms are still used and a set of skeleton keys can be purchased or fabricated with modest effort or expenditure. Such keys are, however, too large for the small warded locks commonly encountered on luggage.
 
While still common, such locks have dubious value. Many can easily be snapped open, sometimes without the need for tools. These, and many other luggage locks, can be bypassed by items such as pens applied to the zipper.

The keys for such small warded locks do not exhibit much variation. Some locks don’t even have any warding inside! I have a key on my bunch from a lock I have not seen for decades. When I encountered a small warded lock recently I tried the key and it opened the lock like they had been made for each other. Below is the lock, the key that opened it and a skeleton key for small warded locks that I made.
Below: A lock with a skeleton key made by filing down a similar key.
Some of your lock picking tools might open a small warded lock. I have opened such a lock using hooks, half-diamonds, single-hump Bogotas and snowmen. A ball or half-ball would probably work too. Just insert the pick and rotate until you trip the latch or spring.
Conventional lock picks are not really designed to take lateral pressure, so such use should be occasional or for when you do not have a better alternative. If you are a customs officer or someone else who often has a legitimate need to regularly open such locks you can make yourself an opener from some stout wire, tube or rod. Below is a photo of one of my turning tools. The rod section of the handle has been given a slight hook for opening small warded locks.
Alternately, the creation of a small skeleton key should be relatively simple, particularly if you already have a similar key. Keys can also be formed from scrap metal. The skeleton key that I made was created from a section of laboratory spatula. It was produced in under three minutes using just pliers and a needle file. This now rides the same ring as my other skeleton keys.
         If you have enjoyed this article or it has been helpful to you please feel free to show your appreciation. Thank you.
The Books

http://www.angelfire.com/art/enchanter/epsdbook.html
http://www.lulu.com/shop/http://www.lulu.com/shop/phil-west/survival-weapons-optimizing-your-arsenal/paperback/product-21488758.html
http://www.lulu.com/shop/phil-west/crash-combat/paperback/product-22603842.html
https://www.amazon.com/Anatopismo-Underrealm-Novella-Phil-West-ebook/dp/B077G7MMFM