Decades ago, just off Regent Street, London had the Museum of Mankind. The museum no longer exists on that site. The premises was closed down and the exhibits merged with the British Museum. The collection at the British Museum is vastly greater than the space available for display so I suspect many of the items from the Museum of Mankind have been sitting in boxes, unviewed for years at a time.
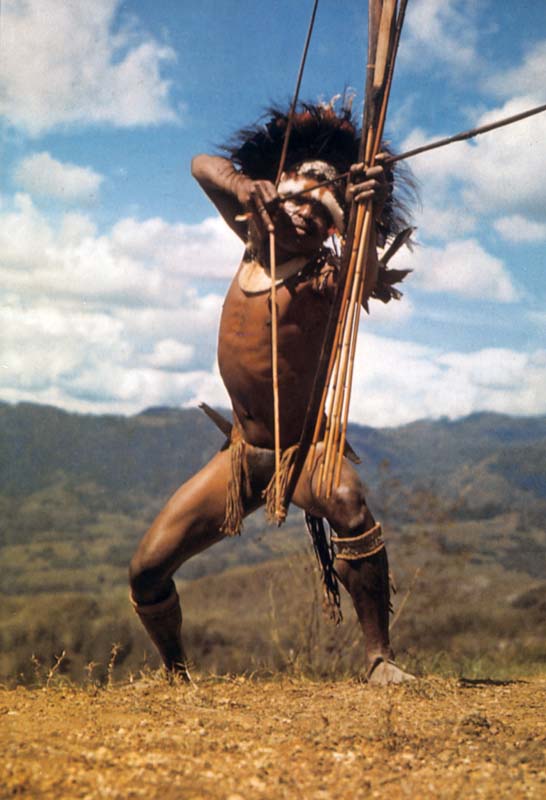
My visits to the Museum of Mankind coincided with an exhibition on Papua New Guinea. There were many interesting things to see. For example, the arrows on display had neither nocks or flights. They were drag-stabilized with a blob of tree gum added just behind the head to adjust the balance. Rather than strings the bows had a broad strap as wide as the base of the arrow.
One of the things that fascinated me was the net bags on display. These were constructed using a repeating multiple knot that reminded me of a figure-eight knot. This technique has been called “knotless” but I tend to think of it as multiple interwoven knots or even one vast, complex knot!
The bags made by this technique are called “bilum” on many webpages so we will call this technique of construction “bilum knotting”.
If you have read my book on knots you will know at least two ways to make nets. Bilum knotting creates and expanding bag useful for carrying loads in. Such bags are used to carry everything from phones to babies.
Images of how the knotting is actually done are relatively rare on the internet. Below is the best I could find and I have coloured certain parts in to give a better appreciation of how it works.

Red is the first row, and could have been made going from left to right. I have coloured some of the second row green to illustrate better how it attaches to the previous row. While the second row looks identical it was probably constructed moving from right to left. The lighter green threads show how a row is ended to create a new row. Start the first row with a slip knot.
All this looks complicated but is actually relatively simple. Connect with a neighbour first, then the row above. The most tedious part is pulling the yarn through each new knot. I suggest you find a suitable piece of wood or plastic and make yourself a net-mender’s needle.
To keep the knots even the yarn is looped around strips of flat material. Traditionally long leaves were used. More common now is to use strips of plastic strapping. Created using a former such as this the knots/loops look more like a “ ∫ ” than an “8”. Rulers might make handy formers.
A mandatory charge has been introduced to encourage us to re-use our shopping bags. A bilum net bag may be a useful alternative. It packs up small in a pocket and can carry a large volume.
If you have enjoyed this article or it has been helpful to you please feel free to show your appreciation. Thank you.
The Books
Today’s blog is something a friend sent me. Those of you that have purchased my second book will recall that in the tactical chapter I offer similar advice about the value of frequently stopping to listen and scent.
Here are twelve thoughts from a British Army Sniper. Tip 12 is useful in daily life, and is the reason you are getting this. The other hints are fun and likely worth reading if you hunt, play video games, or engage in recreation battles.
12. SLLS ( Stop, Look, Listen, Smell) This is an army method that allows you to regain your focus<http://www.soldiercombatskills.com/chapter-7-movement/> when the stress of the mission or situation gets too much. When you become too stressed and feel your focus slipping, stop what you are doing, look, listen and smell the surrounding environment. Take as long as you need to regain your focus and return to the task at hand.
Original article, eleven more handy tricks and hints.
http://www.theprepperjournal.com/2015/10/26/12-tips-from-a-british-army-sniper/
How to SLLS https://survivormind.wordpress.com/2012/12/05/stay-alert-stay-alive-slls/
Stop – Everyone takes a knee and completely stops moving. Breathing goes shallow. Nothing moves but your head like it’s on a swivel and you move it in a a slow, deliberate motion so that you don’t even hear your neck rub against your collar. Making the smallest noises can literally cancel out the benefits of this entire exercise. You must be absolutely silent. Part of stopping has to do with feeling as well. You will suddenly notice which direction the wind is blowing. You’ll realize you are a little overdressed because the insides of your thighs are sweating. Etc.
Look – You move your head from side to side, up and down, taking in everything around you. You will start to notice things that you didn’t see before, like an odd boot print, a broken twig in front of you when you are the first man in the movement, a distant fighting position on the side of the hill, etc.
Listen – There is absolute silence from those around you. Your hearing will start to key in on faint noises that you couldn’t hear before. You’ll suddenly realize that there is a road somewhere in the distance through the thick copse of trees in front of you. Animals will begin to make noise again. You may hear enemy troops, laughing in the distance.
Smell – Our ability to smell is muted by the comforts of civilization. If you’ve ever been outdoors for more than a few days at a time and been starved, you start to smell things you never would normally. I once conducted SLLS by myself in a patrol base in Ranger School and smelt peanut butter. I was like WTF? It’s not chow time. I began walking around and found the offender on the very opposite side of the patrol base from me, 100 yards away. Yes, I smelt this clown’s peanut butter from 100 yards away. This would never happen in your outdoor cafeteria at your local University. Like I said, our smell is muted. While conducting SLLS out in nature, you’ll notice things that you normally would not. The smell of weapons discharge, fire, food, dead animals or people, and you’ll smell it at a distance you never thought possible.
More on SLSS; https://www.themuse.com/advice/take-back-control-of-your-workday-with-this-one-simple-sniper-trick
The Books
If you have enjoyed this article or it has been helpful to you please feel free to show your appreciation. Thank you.
The Books
During my recent researches of things Soviet I came across the following rather nice illustration. As is so often the case with these posts, another topic I had been reflecting upon had relevance here. This is not going to be a post on fighting with entrenching tools. There will be treatment of this topic in time, included a little known, possibly exclusive technique that most of you will not have encountered.
Those of you that have read my books will know that I advocate that you should have at least one weapon that can be accessed by your weaker hand. There are a number of scenarios wherein your stronger arm can get trapped, grabbed or wounded. In such a situation you should be able to use your other hand to bring a weapon into action. In the time of the Japanese samurai combats would often end in grappling, the winner being the one who could manoeuvre his opponent to a position from where he could insert a dagger trough a weak point in his opponent’s armour. Such grappling combats were actually fairly common in other cultures that used armour. I use Japan as an example since there are records that some samurai ensured that they wore a dagger on either side of the belt so that they could draw a weapon no matter which arm was entangled with an opponent.
As well as arming both sides, one should also be aware of the danger of having all you weapons on one level. I have been reading about some instances when police officers have been attacked with a tackling action. Since all of a cop’s authorized weapons are generally carried on his belt an attacker hugging him around the waist prevents him from drawing a weapon. The tackler does not need to be a skilled grappler to exploit this position. He can just hang on long enough for his friends to stomp the cop or steal his weapons and turn them against him.
Obviously, having weapons accessible at different levels is prudent. Many soldiers carry a knife on their webbing suspenders. I discuss this further in my second book as the “Pec Knife”. The positioning of such a knife allows it to be accessed with either hand even when one is down on the ground.
During the Second World War many soldiers and SOE agents carried small thumb knives or lapel knives. As the name suggests, these could be concealed behind a suit or uniform lapel. They were also hidden behind trouser braces, cap badges and a wide variety of other places. The lapel knife sheathes were provided with button holes so they could be attached to a button sewn wherever the user desired. At least one agent placed his knife in his inside pocket so he could draw it when asked for his papers.

Many readers will have heard of the “Sap Cap”, a baseball cap with a weight sewn in the back. Some of you will know that this commercial product is predated by “do it yourself” articles that suggest pinning a fishing weight in the back of a hat. The other day I came across a Russian source that advised soldiers to sew a piece of lead 30 x 20 x 1.5mm into the back of their uniform hats. This was a peaked “patrol hat” type item but I suspect that it would work with a beret too. Given that lead is toxic and can be absorbed through the skin I’d not use it in a hat unless it was well insulated. Steel shot, lead-free fishing weights and steel washers have been used instead. The piece of lead suggested above would have weighed less than a third of an ounce so a great weight or mass is probably not needed. As well as the obvious offensive use a sap-cap can be used to strike a hand holding a knife or thrown in the face to create a distraction.
The Soviet soldier using his helmet as a weapon obviously reminded me of the sap-cap idea. A helmet held in the hand also makes a pretty useful buckler against a knife or bayonet. As an aside, in his army days in Malaya my father sharpened the brim of his steel helmet.
If you are armed, you need weapons accessible by either hand. You also need plan for the situation that a weapon may not be accessible due to posture, body position or enemy action. And finally, you need to understand that if attacked there may not be time to draw a weapon. Often attempting to draw rather than initially countering an attack can be a fatal mistake. Your hands, boots and other body parts are the weapons you never have to waste time drawing. Learn how to use them well.
If you have enjoyed this article or it has been helpful to you please feel free to show your appreciation. Thank you.
The Books
Three hundredth post today! Buy the books or the posts will continue!
Today’s blog is effectively an adjunct to Friday’s post on the equipment of a Soviet soldier. You will recall that the wartime Soviet soldier was not issued a blanket or sleeping bag. Instead he was expected to sleep under his greatcoat with his rain cape providing shelter.
I have often come across references to men sleeping under coats or cloaks and been a little bit puzzled. Even a long coat must be shorter than the man that wears it so how do you sleep under it without your feet sticking out? This weekend I came across an account of how the Soviet soldier achieved this. In true communist fashion it involved some teamwork! Note that the Soviet greatcoat had a half belt at the back that gathered some of the coat’s width in. When used for sleeping this belt was undone on one side so that the coat covered a larger area.
Here is how the Soviet Infantrymen did it:-
Blankets, which were brown, although issued in garrison environments were not issued for field use. Soldiers were expected to make do with greatcoats. Here is an example: "On cold nights I shared a greatcoat with quite a few of my wartime comrades in the fighting lines. Many of them have since fallen.
There is no brotherhood that binds people closer than the one that's born in the lines, and a shared greatcoat is one of its symbols. You feel warm and secure with a friend close by. Actually, there are two greatcoats for two. A shared greatcoat is just a figure of speech. So what happens to the second? Duffel bags or lambskin mittens (with two fingers so it's easier to shoot) are used for pillows. The individual tents that double up as cloaks are used as mattresses and the greatcoats are the blankets. The shabbier one covers the feet and legs and the newer one the upper part of the bodies. Both men settle down on the same side. If there is the blessed chance of taking off your boots, the feet are tucked into the sleeves of the greatcoat - a pair of feet to a sleeve. The upper greatcoat is pulled over the shoulder, the shoulder of one fits into the right sleeve, the shoulder of the other into the left. The result is a kind of sleeping bag, warm and cosy. If it gets inordinately cold, the greatcoat is pulled over the heads - one head in one sleeve, the other in the other. When one side goes numb and the other freezes stiff, both men turn over simultaneously and the fitful sleep of the soldier continues."
I have updated Friday’s blog with a link to this account.
If you have enjoyed this article or it has been helpful to you please feel free to show your appreciation. Thank you.
The Books