Showing posts sorted by date for query sewing kit. Sort by relevance Show all posts

Tuesday, 14 July 2020

A Walk to the Park: Lessons learned.

The other day I went for a walk. As it turned out, I was overly ambitious. Due to lockdown and other issues, I have not got out of the house much recently, and this has had more of a toll than I anticipated. After about the fourth or fifth mile my feet were aching, and worse, my hip joins were giving me considerable trouble. I was not able to walk properly for several days after.
One of my excuses for making this trip was I wanted to test a pair of shoes for this blog. About halfway into the walk I realized this was not practical. I have flat feet and torn tendons. In other words, my feet are atypical and whatever I experience, good or bad, is not relevant to most readers.
However, the day did yield a few lessons and observations that I thought I would pass on.
One thing I discovered is that I have lost some weight over the past few months. Normally this would be a good thing, but it meant my trousers were loose on me even with the belt drawn to the last notch. The shoes I was using also had less heel than my usual boots, which meant my trouser bottoms were catching and dragging on the ground. Rolled up, they would not stay up! I resorted to the safety pins in my EDC. I only had two, so this was only partially successful. Conclusion: add more safety pins to the EDC kit. At least half a dozen.
I could have used the two long cords in my pocket to improvise braces for my trousers. I was nearly at my destination by the time this occurred to me.
I was running late that morning, and was keen to get out. Thus, I forgot some things that might have been useful. I only realized that I had forgotten my iPod when I heard some idiot sqwarking down their phone. More importantly, perhaps, I should have added some boiled sweets to my bag. I had planned to buy something for breakfast along the way, but with lockdown there were fewer places open and I didn’t seem to get a chance. Keep a stock of sweets for travelling at “base camp”, and don’t eat them all watching the telly!
The second lesson from this is “make a list”! Do not just have a packing list for when the balloon goes up or the zombies arrive, but one for more mundane expeditions too.
If, like me, you have several rucksacs and daysacs, a practical idea is to have a box with your “rucksac things” in. When you get home, empty your rucksac paraphernalia into the box. When you head out, select items from the box and load them into whatever pack you have decided to use. And have a list! Not everything you might want will be in the box; at least one of my water-bottles lives in the fridge. Similarly, you pick and choose from the contents of the list. Warm hat and gloves may be low priority in summer, for example.
What I did remember to add to my pack was a bottle of water, my boonie hat and a rain-poncho. The hat was for if it was really sunny; it wasn’t. The poncho, on the other hand, got used several times. This was my first time trying this particular one out and it came through very well. It is very light (240 g, in stuffsack) and was quick to unpack and put on. I also like that it covers my daysac as well as myself. Another feature that endears it to me is the stuffsack is so sized that it does not take a mastership of origami to get the poncho back in.


Multi-role solid-state communication and repair system.

Incidentally, I have made another modification to my EDC kit. Originally it did not contain a sewing kit. My travel sewing kit has seen a lot of use over the years, so I decided some sewing capability should be in the EDC. The weight of a single needle and thread is negligible, yet potentially very useful. In fact I have added two. One is a standard needle with about a metre of doubled invisible thread already attached. The other is a larger needle with just over half a metre of doubled stouter thread. I would have used dental floss for this normally, but had some kevlar cord from Shomer-tech that I wanted to try out. Both needles have been threaded beforehand and are carried taped to the side of my pencil. I gave them a few score strokes of a magnet so they may also serve as a navigation aid.

If you have enjoyed this article or it has been helpful to you please feel free to show your appreciation. Thank you.

http://www.angelfire.com/art/enchanter/epsdbook.html
http://www.lulu.com/shop/phil-west/crash-combat/paperback/product-22603842.html
http://www.lulu.com/shop/http://www.lulu.com/shop/phil-west/survival-weapons-optimizing-your-arsenal/paperback/product-21488758.html
https://www.amazon.com/Anatopismo-Underrealm-Novella-Phil-West-ebook/dp/B077G7MMFM
https://www.amazon.com/Hell-Ay-non-partisan-sourcebook-role-play-system-ebook/dp/B07FQSHSQC

Saturday, 6 June 2020

Combat Carry: The Hippy Configuration.

A friend of mine commented that Canadian troops were wedded to the idea of carrying at least six to seven magazines. Recently, I was reminded that many water-bottle pouches can hold five or six 30-round magazines. I also came across a comment pointing out that you do not want your magazine pouches where most troops actually carry them, at the front on the waist. Lousy to crawl with them at the front, worse to fall on. Not so comfortable if you have to sit down, and many armies now have more drivers than infantry. That is not necessarily a bad thing! A small force, well-supported, can achieve more than a large, poorly supported one. This is how many guerilla, terrorist and clandestine forces operate. There are relatively few “trigger-pullers” and a much larger number of support and intelligence-gatherers. Put the right person, in the right place, at the right time with the right tools.
Load-bearing equipment (LBE) tends to be designed with the infantry in mind, but most of its users will be signalers, engineers, gunners and drivers.

Thinking further, most troops reload with their weak-side hand. (It might be different for some bullpups, but seems true for the M16, AKM and their relatives). It makes sense to have most of the ammo where the weak hand can easily reach it? Why not have a water-bottle/ utility pouch of magazines on the weak side of the belt, at the side? If you read my blog on chest-rigs you may recall the four-magazine pouches for the AK issued by some armies. Someone will object that all the magazines could get tipped out at once, so alternately, a pair of ALICE-type magazine “cases” that hold three magazines each. These would tend to sit at eight and ten “o’clock” on the belt (for right-handers), which may be more comfortable. Most rifle-magazine pouches available nowadays hold two magazines, and a pair of these will be less bulky. Additional magazines can be carried in chest or sleeve pockets or other locations.
Some experimentation will be prudent. Pouches for three mags usually sit with the spines of the magazines towards the body. Side-on may be better. Pouches might be more accessible orientated obliquely or laid horizontally. And we need to remember the soldier may need to reload while prone.
The above arrangement puts 4 to 6 lbs on one side of your belt or harness, but there is a logical way to balance this. The soldier will use his grenades in his strong hand, so on the strong-side of the belt we put a pouch or pouches holding several grenades. When throwing prone, you lay on your weak-side, so it is logical to have your primary source of grenades on the strong-side. Perhaps some frags at two o’clock, pouches for one or two cylindrical grenades such as smoke bombs at four. Actual grenade load-out will depend on combat role and mission. Alternately, a smoke grenade pouch can carry a 500ml water-bottle.
So far we have one pouch or pouches on one side of the belt, another set on the other. Our soldier is well-armed, yet front and back areas of the belt region are relatively clear, allowing our soldier to comfortably sit in a vehicle or crawl if someone is shooting at him or he doesn’t want to be seen. No bulky butt-pack or kidney-pouches at the back that hinder him (or her) carrying a rucksack, or wave at the enemy as they crawl. 

The front of the belt can be used for relatively small, low bulk items, such as a compass pouch and some shell-dressings. With a number of small pouches the front of the belt could end up looking like an old Garand ammo belt! (above) For non-infantry the front of the belt will probably end up carrying small specialist tools and items. For some personnel the grenades and magazines at the side may be replaced by larger utility pouches.
The back of the belt is clear so far. This clearly contributes to comfort when seated in a vehicle or carrying a long pack. Here I am going to revive my “camelbum” concept and suggest a second belt, mounting two pouches. One pouch (clearly marked, and marked with blood group) contains an IFAK (Immediate First Aid Kit) for the soldier. The other is the same model of pouch containing a two-litre water-bladder dimensioned to fit inside. Having their own belt allows these to be worn rather like a bumbag. They can be added when in high readiness and shunted round the front or to a more convenient position when the soldier is seated or carrying a pack.

An entrenching tool or other tools can be shoved through the belt when needed, carried on the backpack when not. As I have discussed elsewhere, carrying cases for such tools are superfluous, and have no place on the primary LBE. A small, fixed-blade utility knife of about 25cm loa. should be mounted over the weak-side pectorial muscle where it can be reached with either hand. See my books Survival Weapons and Crash Combat for more on this. If a bayonet is carried, the logical place for it is on the weak-side of the belt, possibly mounted on the side of a magazine pouch in the manner of the British 58 webbing. A larger survival knife such as a machete or kukri should probably be attached to the trouser belt, so it remains on-person should the LBE need to be discarded in an emergency. The same is true of a handgun, which will likely be carried on the opposite side of the trouser belt. Field jackets and other garments should be modified/ redesigned so that tools and weapons carried in this manner are accessible. This arrangement places the survival knife in the space between the magazine pouch(es) and the trouser belt, and the handgun behind/ between the grenade pouches.
I have described this equipment configuration as mounted on a conventional LBE belt, but the basic concept should work with other carry systems. Rather than on the waist, those weak-side magazine pouches might be mounted in the area under the arm, and this gives some possible alternate configurations. For example, three dual-magazine pouches mounted horizontally or obliquely.
One currently fashionable item I have not mentioned above is the “dump-pouch” for empty magazines. What to do you do with those empty magazines? If fitted with a cord pull-loop (as described in Survival Weapons) you can clip them onto a snap-link on your LBE or rucksack strap, although this may admittedly be a challenge while most of your attention is understandably on more pressing concerns. Back in the day you might drop them down the front of your smock or jacket, but is difficult with modern combat wear and armour. The current solution is to fumble for a belt-mounted “dump pouch”, but the LBE belt is fairly crowded already and there may be more useful things that could use that space. There is an easier, simpler, more efficient and cheaper option.
Take a sandbag and cut off the bottom foot or so. Save the rest for making textilage. Hem the new top edge of the bag. You may choose to add a drawcord here at this step, although the cord is not needed for the dump-sack role. Put a ring or loop at each top corner of the cord so you can tie or snap-link a strap or two to it. Straps should be easily adjustable for length, so should have some form of buckle. You may like to add a length of cord to each lower corner of the bag.
A sandbag is good because they are often readily available and the light tan colour is good for most environments. You can, however, make these bags out of any suitably coloured piece of cloth, including discarded or damaged combat wear and old tee-shirts. If you have access to a sewing machine, even a little cheap one, you can knock these out in minutes.
You will have to disguise the basic rectangular shape of the bag, so regardless of what you made it from, add some scraps of cloth and sandbag as textilage. Don’t forget the straps. Some bold blobs of any suitably coloured and contrasting paint you have handy can be added too.
Adjust your strap so the bag hangs from your neck, at about chest level. Use the lower cords to keep it in place if you wish. When you change magazines you can drop the empty into the open mouth of your neck bag. The bag also helps camouflage your chest area. Since this area is subject to body-shading it helps that the basic colour of the bag is light. The neck bag will fit over a “reasonably-size” chest-rig while still allowing access to magazines.
The neck bag is a handy place to quickly stow anything else you come across during an operation. Bunch of materials or possessions that might provide intelligence? Drop them down your neck bag and examine them later. When not in use a bag easily rolls up and can be kept rolled by tying one of the corner cords into a slippery hitch. A quick tug and the bag can be unrolled. Such simple bags will provide useful for lots of other purposes. They are useful for foraging or supplying extra ammunition to crew-served weapons. Add a pair of snap-on straps, or use one “Veshmeshok”-style and use as a simple rucksack.

If you have enjoyed this article or it has been helpful to you please feel free to show your appreciation. Thank you.


http://www.angelfire.com/art/enchanter/epsdbook.html
http://www.lulu.com/shop/phil-west/crash-combat/paperback/product-22603842.html
http://www.lulu.com/shop/http://www.lulu.com/shop/phil-west/survival-weapons-optimizing-your-arsenal/paperback/product-21488758.html
https://www.amazon.com/Anatopismo-Underrealm-Novella-Phil-West-ebook/dp/B077G7MMFM
https://www.amazon.com/Hell-Ay-non-partisan-sourcebook-role-play-system-ebook/dp/B07FQSHSQC


Wednesday, 8 April 2020

Around The World In 30 Litres.

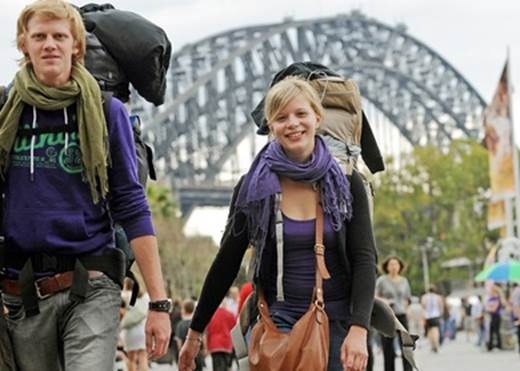
Decades ago I wrote a piece called something like “Travelling the World with a 30 Litre Pack”. This was so long ago it was on a floppy disc and it only ever got read as a print-out. That article is long since lost, but the experiences that contributed to it has also fueled many of the articles on this blog. I was asked if I could attempt to reproduce the article, since much of it is still relevant to travelers today. 

Firstly, I will point out this was not intended for wilderness expeditions or camping trips, but for holidays in areas where youth hostels or similar accommodation was available. On the trips where I expected to also do some camping, I carried a larger pack and more gear. Thinking back, I never personally made any of my trips with just a 30 litre pack. My daysac was smaller, and I already owned several larger packs. Money was often tight so I never got around to buying myself a nice 30. That said, one of the people who read the original article was inspired to spent nearly a month traveling around India with just a small pack.
One advantage of a larger pack is that you can carry a packed daysac inside it, which saves a lot of unpacking and packing when you want to dump the gear you don’t need for a few hours of sightseeing.
One of the products of my travels was “Uncle Phil’s List”, so I will use its categories for the following description.

The first category was “shelter”, which divides into shelter, sleeping and clothing.
Accommodation was in hostels or budget accommodation. The former were preferred for their social aspect, and I have many fine memories from such stays. The only thing I needed to carry for shelter was a credit card and a YHA membership card.
My daysac carried (and still has) an all-weather blanket, which over the years has been put to many uses. 

Many youth hostels do insist you have a sleeping bag liner. Mine got accidentally placed in the laundry on my last day at a hostel. My current one was sewn from the sheets the apologetic warden offered me as replacement. The top of the bag has some very distinctive cloth added to the top, to avoid this happening again. If I have to unpack in the dark the texture helps me orientate the bag. There are silk liners, which look really nice, but again, I have never been able to justify the expense.
I also carried a Merlin Softie one-season sleeping bag. This packs to the size of a rugby ball without using compression straps. Very useful when the bedding provided was not up to standard, or when I had to sleep on a bus, train or ferry on an overnight journey. Overnight trips were a useful trick when traveling on a tight budget. Saved on a night’s accommodation and got you to a new place to see. 

Careful selection of clothing can save you lots of weight. I encountered travelers who were carrying 20+ kg of clothes!
The trick is to select items that were easy to hand-wash, and just as importantly, quick to dry. I was fortunate that about the time I began traveling there were lots of reasonably priced silk shirts on sale. My basic travel wardrobe was two long-sleeved silk shirts and two short-sleeved. Theoretically, if it was cold I could have wore a short-sleeve under a long, but don’t ever recall this need arising. Denmark was a little chilly, so I brought a thin woolen jumper to supplement my usual gear. I did not know about ranger rolling back then. I could probably have packed things even smaller.
Underwear was three pairs of black swimming shorts, the sort with pockets and inner liners. If the day was hot I could easily remove my trousers and be already in shorts. Due to the odd climate inside airliners, for the flight out I found cotton underpants more comfortable. These would probably not be worn again until the flight back. I might wear a cotton tee-shirt for the flights instead of the silks. More commonly, I wore a casual cotton shirt that served as a light jacket for the rest of the trip.
The markets no longer seem to have reasonably priced silk shirts so as mine have worn out I have replaced them with the newer microfibre synthetics.
Just before a trip I would treat myself to some new socks, usually white cotton sports socks. Three pairs of these would go in the bag and a fourth pair worn on the trip out. When I began to get pains in my legs when flying I added a pair of compression socks to my load-out.
I carried two pairs of trousers, basically a “wear and a spare”. Cargoes’ would be fine, although one of my pairs was “smarter”. On some trips I hooked up with friends I had made on other trips. This often involved a family dinner so being able to smarten-up was useful. At the airport I often needed my passport and boarding pass readily to hand, and the large thigh pockets of the cargo trousers was very useful for this.
Since I was carrying a pack, and sometimes had to deal with rough terrain, including cobbled streets within towns, ankle support was a priority. Most of my trips were to hotter climes, so footwear of choice was canvas hiking boots. Honourable mention goes to my Hi-Tech Sierras. I only wore these during holidays, but they did so many miles the soles were treadless by the time I had to retire them. I was most disappointed to discover the line had been discontinued. The Hi-Tech Trilogies I brought as replacement nearly crippled me. My tendons bled and my toes too, if I recall correctly. Brand new white cotton socks soaked in blood. I have a different set of canvas boots now. Unlike the Sierras these have gore-tex. You don’t need gore-tex for what I am using them for, but finding canvas boots without it no longer seemed to be possible. In addition to the boots I also carried a pair of espadrilles or kung-fu slippers. If you have been wearing boots all day it is nice to slip into these when you head into town looking for dinner and a beer.
An important item was a rainproof jacket, ideally a lightweight one that packed into its own pocket or small pouch. The latter quality was far more important than it being breathable or some wonder fabric. I discovered that breathable waterproofs have a finite life, and you get to know that time is up the hard way, during a rainstorm!
I carried a lightweight jacket of some synthetic material for some protection against the wind. One of these had a cotton liner which I replaced with one made from a silk shirt. I don’t recall using these jackets much. Often I would use my cotton shirt, fleece or rainproof. I carried a fleece for colder days and evenings. This had a more windproof outer than most fleeces, so was more practical for outerwear.
Clothing included a boonie hat for sun protection, and several bandannas, one in a trouser pocket, the others in the pack. I carried a pair of gloves, although seldom needed them in hot climates.
The secret to carrying so little clothing is being willing to clean it during your trip. You will notice that most of the items I carried are quick-drying materials such as synthetics or silk. The cotton socks are an obvious exception, but these dried pretty well in the climates I traveled in. In such conditions putting on slightly damp socks was not a health problem. 

The only laundry gear I carried was a small nail brush. The same soap I washed and shaved myself with served as detergent. Washing socks generally involved putting them over my hands and “washing my hands”. The brush worked well on collars. Often I would step into a shower wearing a silk shirt and clutching a bundle of other items to wash. Hang a silk shirt on a hanger and it dries without needing ironing. In fact, the same is true of cotton tee-shirts!
Moving on to other categories: I carry a lighter as part of my EDC, which covered the requirement for fire. My daysac carried a water-bottle, although this might be moved to the outer pocket of a larger pack if I was carrying one. On more recent trips this has been one of my Platypus bottles, often the larger one with a drinking tube. On some trips I simply brought a large bottle of soda in a local store, then used the bottle for water once the soda was drunk. For most of my trips you could trust the local tap-water, but I did acquire a cup device that chlorinated water passed through it. You might wise to include a bottle of purification tablets instead.
I was seldom anywhere where I could not purchase food. The times I was, a few hours hungry would not kill me. Thus I carried nothing to cook with on hosteling trips. The bag soon acquired some local foods such as fruit, salami, bread and cheese. I can still recall sitting outside the Parthenon, making a sandwich with my penknife and surrounded by feral cats sunning themselves. I learnt to carry a bag of boiled sweets (aka “hard candy”). These provided an energy boost when climbing hills: most sights to see seem to be up hills or high up! And I will admit that offering a sweet to a fellow traveler was a great ice-breaker and gained me some very memorable companions over the years.
My travel medical kit I have described elsewhere. Medication appears in my current load-out, but I did not need such things in my younger days! My daysac included a bottle of sunscreen and one of insect repellent. These days you will have to ensure that the volumes of these are less than 100mls if you intend to travel by air. Another item for your daysac is a roll of toilet paper in a plastic bag. Over the years I refined and optimized my wash kit. This is described here.
My tiny sewing kit has seen a lot of use over the years, so is something it would be very foolish not to carry. My “spares and repairs” includes a couple of spare rucksac buckles, electrical tape, string and a tube of superglue.
Documents included my passport and any visa needed. Plane tickets: no e-tickets on smart phones back then! In Europe I carried the E111 medical treatment form, but these may no longer be valid. A zipped pouch such as a pencil case proved very useful to hold documents and other miscellaneous items. Traveler cheques, although I doubt modern travelers carry these. A photocopy of my passport, and record of the traveler cheque numbers went in the pencil case. I did have my cheques stolen on one trip, and got all my money back, since I had the numbers to cancel them. Wisely, I carried my credit card in a different place so that was not stolen. A couple of guide books, usually borrowed from the local library at home. Have more than one, since entries can be misleading or inaccurate. A phrasebook. A novel or similar to read while waiting for trains or just sitting in the sun. A notepad in a plastic bag, and something to write with.
I carried my penknife on my person, and often it has proved useful. My daysac included a flashlight of some form, in an outside pocket so it was readily accessible. A telescopic hiking pole was a blessing on steep terrain or when tired.
One of the first things I would do when reaching a new town was locate the tourist office and acquire any street maps they had. My EDC includes a Suunto Clipper compass and this has often proved useful when navigating a strange town. 
An item conspicuously absent from my original article was a mobile phone. They were only just coming in, they needed frequent recharging, and you were unlikely to find facilities to charge them, back then. My trips were an escape, so I made a point of leaving all my electronic devices at home, which probably would have been a Walkman back then! Not really being a photographer, I also never bothered carrying a camera.
Few backpacks are totally waterproof, so the contents should be in one or more plastic bags. These needn’t be anything expensive, just intact. If you are traveling with just one pack I suggest you divide the contents with at least two bags. One bag holds your bedding, wash-kit and most of your clothing. The other bag has the items you may need during a day’s sightseeing: medical kit, guide books, raincoat etc.

If you have enjoyed this article or it has been helpful to you please feel free to show your appreciation. Thank you.

http://www.angelfire.com/art/enchanter/epsdbook.html
http://www.lulu.com/shop/http://www.lulu.com/shop/phil-west/survival-weapons-optimizing-your-arsenal/paperback/product-21488758.html
http://www.lulu.com/shop/phil-west/crash-combat/paperback/product-22603842.html
https://www.amazon.com/Anatopismo-Underrealm-Novella-Phil-West-ebook/dp/B077G7MMFM
https://www.amazon.com/Hell-Ay-non-partisan-sourcebook-role-play-system-ebook/dp/B07FQSHSQC


Monday, 30 March 2020

Optimizing Canteen Cups.

Yesterday I happened across this webpage. This is a concept that I have encountered before: that the optimum proportions for a cylinder are to have it at a height equal to its diameter. The non-calculus explanation for this goes something like “a sphere has the lowest ratio of surface area to volume and a cylinder of equal diameter and height is closest that a cylinder can get to a sphere”. Optimum use of materials means less weight to carry. You would think there would be a special name for such a cylinder, but if there is I have yet to encounter it.
This concept can be applied to the design of hiking and survival gear. Yesterday I wrote a little about canteen cups and muckets. In a previous post I mentioned a idea that a good size for an eating vessel was around half a litre.
If you have to travel light, your main, probably only, cooking vessel will be a canteen cup, and this will also serve as your bowl and your mug. Most of us have to make do with whatever we can get, which is usually a military design. Perhaps our most important, most likely cooking vessel deserves greater consideration? Let us imagine we are designing a better canteen cup. The above concepts may play a part.
The typical military canteen cup has a kidney-shaped cross-section. They are designed with the assumption that they will be carried with a water-bottle, and that that bottle may be worn on the belt. Assumptions are always dangerous beasties, and should occasionally be tested to discover if they have gone rogue!
Obviously, carrying a supply of water on your person is prudent. Depending on situation and other factors this may be anywhere between 500mls to 2 litres. Larger volumes should be considered a pack item. Your typical military water-bottle is not the best way to carry water on your belt. If you land on it when falling or taking cover, it can hurt or bruise you. If it is only partially filled noises of water sloshing may betray you. Many designs have a cup that fits over the top of the bottle, meaning you have to remove this and keep it safe every time you want to drink from the bottle. That snap-link I told you to attach to your webbing can prove useful here, but this can still be a hassle when you are half-way up a windy hillside and trying not to drop your rifle or lose sight of your mates. For the above reasons a lot of soldiers and outdoorsmen now prefer bladders with drinking tubes such as Camelback and Platypus.
Does the cup need to fit outside a water-bottle? That interior space can be put to use for lots of other useful items. A hank of cord, fuel tablets and/or tube of alcohol fuel paste, small medical kit, sewing kit, spare lighter, tea and coffee bags, instant soup, OXO cubes and so on.
Does the cup need to be on your belt? Generations of British soldiers will probably disagree with me here, but usually a hot cuppa is not life and death. Your survival gear should be at skin level and your belt/webbing reserved for immediate items: ammo, a good knife, a couple of litres of water, IFAK trauma kit. Your canteen cup should be a pack item, preferably in a readily accessible side-pocket.
What is the ideal shape for a canteen cup? A spherical vessel is not really practical for a number of reasons. A hemispherical bowl of around 500mls capacity will be about 12 cm/ 5" across and 6 cm/ 2.5" deep. Such a bowl can be used for both eating and drinking from but may not be the best shape for a cooking vessel. Woks generally need to be wider. A cube of around 500mls capacity has 8 cm sides. The corners may be difficult to get clean with a vessel of this width. Another space-efficient option is a half-cube, 10 cm square and 5 cm deep. This has potential. This might resemble a smaller, square-section version of the familiar British Army mess-tin. Plenty of tea has been drunk from these, but it is not the best shape for a mug. This brings us to a cylinder of equal diameter to height, or thereabouts. For a capacity of about 500ml, height and diameter will need to be around 9 cm/ 3.5". This seems wide enough to eat out of and keep clean, deep enough for cooking and drinking. On the other hand, this shape may be too wide for easy carriage in a back-pack side-pocket.
This suggests that our canteen cup should be flattened in cross-section, and if we take this route we might as well give it a kidney-shaped cross-section. Realistically, most end-users will probably not buy a canteen cup unless it is this shape! There is probably an optimum ratio of height to end-size for a kidney-section vessel, but the calculus is beyond me.
The above figures are based on another assumption: that we want a volume of around 500mls. Looking at four of the metal canteen cups I own there is a notable difference in sizes. The British Crusader Mk1 is noticeably bigger than the US cup and the upper cup from the Bundeswehr M59 canteen. This may partially be so the Crusader can fit over the bottom of the Osprey waterbottle. The Osprey has a plastic mug that fits over the top (!). Theoretically you can carry both this mug and the metal Crusader around the same bottle. In practice you are better leaving the plastic mug for kit inspections. Also notable is that the Crusader Mk2 has a larger capacity than the Mk1.
A quick exercise with a measuring jug and some water yielded the following approximate volumes:
  • German M59 upper cup: 450ml
  • Dutch canteen cup: 500ml
  • Crusader Mk1: 650ml
  • Crusader Mk2: 800ml


The Dutch cup appears closest to our theoretical ideal. This is about 13 x 8 cm across and 9.5 cm deep. I don’t know if that is optimal, but the basic shape has not changed since 1910! The Dutch cup is a sound choice for your emergency kit, but the British cups are ahead on features such as non-stick coatings, measuring marks and accessories. 


Even more interesting was weighing the cups. The Dutch cup was 9.4oz/ 266gm, the Crusader Mk 1 was 9.7oz/ 275gm yet the larger volume Mk 2 only 6.9 oz/ 195 gm.

What this boils down to (pun intended) is that most of the commonly available choices are fairly sound, but there is room for improvement. While issues such as lids and bail handles need addressing, optimizing proportions could save additional weight. A smaller version of the Crusader Mk2 would be an attractive product.

If you have enjoyed this article or it has been helpful to you please feel free to show your appreciation. Thank you.

http://www.angelfire.com/art/enchanter/epsdbook.html
http://www.lulu.com/shop/http://www.lulu.com/shop/phil-west/survival-weapons-optimizing-your-arsenal/paperback/product-21488758.html
http://www.lulu.com/shop/phil-west/crash-combat/paperback/product-22603842.html
https://www.amazon.com/Anatopismo-Underrealm-Novella-Phil-West-ebook/dp/B077G7MMFM
https://www.amazon.com/Hell-Ay-non-partisan-sourcebook-role-play-system-ebook/dp/B07FQSHSQC


Wednesday, 7 August 2019

Skin-Level Survival EDC.

Suppose that you are separated from your bag or rucksack. Your webbing gear, if you wore any, has become damaged or lost. All you have is the clothes you stand up in and whatever is in your pockets. This is your “skin-level” survival kit. 

Part of your skin-level kit is the clothes that you are wearing. Hopefully you were dressed appropriately for the climate. If you were chilling by the pool when everything went pear-shaped one of your first priorities is going to be to acquire some new threads.

Today I am mainly going to concentrate on what you have in your pockets, or carried on your trouser belt. This is what many people would call “EDC” or “everyday carry”, although the exact use of this term varies. Some people would include the contents of their daysac or handbag in their EDC. This article will assume that such items are not immediately available. Reaching them may be one of your objectives. Some people use the term “EDC” for all the paraphernalia they have on their person, while in other contexts it is specific for defensive weapons. This article intends to examine EDC for survival.

Look on the internet and you will find EDC lists that suggest you should always carry a solar still, fishing kit, gold coins, eating utensils and so on. This is not very practical. The heavier and bulkier your EDC kit becomes the more likely you are to not carry it all the time and omit parts you may need.

A good EDC survival kit is designed to have two tiers of readiness. “Lower level” is what you carry all the time. Many of these items are carried because they can be useful in daily life. “Higher level” are items that you add when you step up to a higher level of readiness. Your lower-level kit would be on you when you go down to the store. You would add the higher-level items if you were leaving town to hike in the woods.

For example, in my lower-level kit I have a lighter, which can be used for fire-making or illumination. The expansion to higher-level is a little pouch that adds a container of tinder, some candles and a spare lighter. I have little need for a fishing and snaring kit in town, so these items are higher-level.

Many ingenious individuals have had fun creating survival vests, survival jackets, survival walking sticks, survival pens, survival necklaces or survival hats. These are not the best way of carrying your EDC. Jacket pockets are better used for items such as gloves, scarves and hats. Your survival EDC should be based around your trousers. Everything should fit in your pockets, or on your trouser belt. Since you (hopefully) wash your trousers, items should be easy to transfer to a new pair, or to a pair of shorts if the weather permits. What you carry should not add so much weight that you have trouble keeping your trousers up. Nothing should be so bulky or hard-edged that it digs into you if you have to sleep clothed, bangs against you when walking or might injure you if you fall on it. Personally, I am seldom not wearing cargo trousers or shorts. If you have to dress more formally there are companies that sell suitable garments with extra, hidden pockets. 

Let us have a look at what I am carrying, and how I might expand it to a higher-level. Your up-level items should be stored together in a small bag such as a pencil case. Keep this with your knife-belt (qv).


Fire: The lighter in my left pocket is my primary source of fire. To up-level I will use a small fire kit that would be carried in my right cargo pocket. As described on other pages, this would have a spare lighter, a container of tinder, Fresnel lens (above), some candles and possibly some matches. Note that the spare lighter is in a different pocket to the primary.

Food: I don't carry any food on me, so this category is more about means to procure food. At low readiness that is money and a credit card. For higher-level I have a container of line, hooks, wire and other fishing items. The dental floss I have in my pocket pack could be used for snaring or fishing, the safety pins serving as hooks. If you are diabetic you may want to add a small supply of glucose tablets, hard candy etc. You could carry a tightly rolled sheet of cooking foil, but I personally don't currently do this.

Signaling: I usually carry a phone. As well as being able to call for help, many modern phones have useful applications such as a notepad, compass or GPS capability. Phones are useful but also delicate so should not be the sole thing you rely on. The photon light on my keyring could be used to signal. The keyring also has a whistle. My pocket kit includes a pencil and chalk, and I carry a pen (a retractable Zebra pen, since my belt pouch is rather small. I actually found this pen! Non-retractable, all-steel Zebras are suggested as a good alternative to more expensive “tactical” pens). Up-leveling would probably add a larger, but compact, pocket torch. A lightweight signaling mirror is another useful item. These are a good addition for tactical scenarios since they can be used to peek around cover. You may already have an item that can be used as a signaling mirror. Many compasses have a mirror and some phones or music players have mirrored backs. A mini-flare kit could be accommodated with the other items in the right cargo pocket, but I have never actually owned one of these. A larger whistle, on a lanyard, might prove useful. There are cord necklaces that include a flint and steel. If you can find them at reasonable price add a whistle, photon light and a snap-link.

Shelter: Most actual shelter items are too bulky for skin-level EDC. The exception is a space blanket. One permanently rides in my pocket kit. You may want to carry additional space blankets. Not only can they be used for warmth, but also as protection from the rain and for signaling. Penny for penny and pound for pound space blankets are among the best survival gear you can carry. Do not leave home without one.

Cordage: The dental floss in my pocket kit has already been mentioned. Either carry a couple of spare bootlaces or a arm-span of paracord. This can easily be carried in the bottom of a pocket and has numerous applications. If up-leveling, a larger hank of paracord can be carried on your person if you have room. Braided fishing line also has many uses.

Tools: My keyring includes a bottle-opener, mini-Swiss army knife, a P38 can opener and a little tool for removing SIM cards and opening CD drives. That last tool possibly does not have a survival application. The keyring itself is a carabiner. Several of my items can open bottles. The bottle opener is just a convenience, particulary in social settings. 

A small pouch on my belt carries by clipper compass, a pen, a trio of lock-picks (two Bogotas and a snake), money, credit cards and a USB drive. A second pouch has my Swiss army knife, mini-leatherman, pocket prybar and a sharpening card. The Swiss army knife includes a screwdriver that can repair glasses. 

A small bag in my pocket kit contains a few safety pins, hair pins and paper clips. These can be put to various uses. A length of electrical tape is wrapped around my pencil. I may add a needle with a metre of invisible thread. I don't regard a sewing kit as an EDC-level requirement, but the weight is negligible and a sharp point potentially useful.

If up-leveling my main additions would be a larger knife and compass. More of that later.

Water: There are water bottles that can fit in a cargo pocket or on a trouser belt. The bulk and weight of water means that you are unlikely to carry water at skin level unless the weather is very hot. A few sheets of water purification tablets can be included in your pocket medical kit. If up-levelling the water category, I might add a “survival straw”, ideally one that fits in a cargo pocket. A condom could be used as a water carrier, but I don't carry them, no longer being single.

Medical: Your EDC medical kit is mainly for minor injuries. Have a better kit in your bag. My pocket medical kit rides in my left cargo pocket. In addition to the items already mentioned it has alcohol wipes, plasters and pain-killers. There is some medication I have to take with meals so I carry a few days supply of this in my right cargo pocket. If you need to take medication regularly then you should carry a few days supply with you and make sure it remains in-date. If up-levelling a small container of insect repellent and/or sun-cream might be a prudent addition. This need only be a small volume, your main supply being in your bag or base. Chapstick or vaseline in winter, if you think you will need it.

Other items: If you are out in the wilds a few metres of toilet roll or paper tissues in a ziplock bag should be added to one of your cargo pockets. Make that a permanent part of your kit if you wish.I have a small bag with a few paper napkins for about town” and a larger bag I add for rural”.
A bandanna has numerous uses and is easily carried in a side pocket. Since I lack some hair I have used mine for head protection when caught out without a hat.
I wear photochromic glasses so don't carry sunglasses. These protect the eyes from both excessive light levels and more physical threats.

Non-survival items carried are a USB drive, travel card and music player, although the back of the latter is a mirror.

So far we have talked about pockets and belt pouches. In years past most of my EDC was in a compact bumbag. I have learnt to make more use of my cargo pockets and have replaced the bumbag with a couple of pouches. One is a repurposed pouch for a mobile phone. You should not add so many pouches to your trouser belt that it interferes with carrying a rucksack, or sitting in a vehicle. There are belts that are made of paracord, but if you unravel them to use the cord you have nothing to hold up your trousers, nor hang your pouches from! There are trouser-belts with hidden storage compartments, and various ingenious buckles. The original boyscout belt had a buckle that served as a bottle opener.

Earlier on I mentioned adding a larger knife and compass to the skin-level kit. My favorite kukri weighs just under a pound, but hanging it on the trouser-belt is a bit much. What you need is a second belt. This is effectively an intermediate level between skin-level and webbing. When at a higher level of readiness you should attempt to keep it upon your person. Your knife belt rides below the trouser-belt, like a cowboy's gun-belt. It should be adjustable, so that it can be worn over thick clothing when desired. Add a compass pouch to one side of the belt, and attach the compass lanyard to the belt. Add a carabiner or snap-link to the front of the belt. I carry my kukri on one side of the belt and a Mora puukko knife on the other. Not surprisingly, this belt could also be used to carry a handgun. If I need to carry a hatchet or entrenching tool I can slip it between belt and body. A folded rain-jacket, poncho or unfolded space blanket can be draped over the back of the belt.

Many police officers experience medical problems from the weight of their duty belts. Detaching the duty belt from the trouser-belt and wearing it lower like a gun-belt might improve matters.

The knife belt can be used to carry a litre or two of water. The best way to carry water is in bladders since this is lighter than conventional bottles. Rather than placing the weight on the knife belt my proposed “camelbum”concept would give more options.

I have mentioned carabiners and snap-links a couple of times. Use one as your keyring, add one to your whistle lanyard and knife belt. Also have them on your rucksac strap and/or webbing. When you need a hand free, or there is a risk you might drop a tool, attach the tool to the nearest snap-link. This is an extension of the idea to collect empty magazines described in my book “Survival Weapons”. Make sure your tools have loops or rings.


If you have enjoyed this article or it has been helpful to you please feel free to show your appreciation. Thank you.
The Books

http://www.angelfire.com/art/enchanter/epsdbook.html
http://www.lulu.com/shop/http://www.lulu.com/shop/phil-west/survival-weapons-optimizing-your-arsenal/paperback/product-21488758.html
http://www.lulu.com/shop/phil-west/crash-combat/paperback/product-22603842.html
https://www.amazon.com/Anatopismo-Underrealm-Novella-Phil-West-ebook/dp/B077G7MMFM
https://www.amazon.com/Hell-Ay-non-partisan-sourcebook-role-play-system-ebook/dp/B07FQSHSQC