Showing posts sorted by relevance for query suunto. Sort by date Show all posts

Monday, 28 November 2016

Suunto Clipper.


          The engineer’s compass is my oldest compass but the compass that I have used the most is my Suunto clipper. At first glance you may mistake this for a simple button compass of the sort so often found in survival kits. Look more closely and there are two distinctive features.


          The first feature, and what gives it its name, is the Suunto clipper has a clip. This can be clipped onto your watch strap but I have in the past attached it to lapels or cuffs, as needed. It is a well-designed clip which will securely grip a strap or material of sufficient thickness.

          The other feature is that this diminutive compass has a moving bezel. The bezel is marked in 10 degree increments, with letters at the four cardinal directions and numerals every 30 degrees in between. The bezel rotates with audible “clicks”. Interestingly, there are four clicks to every 30 degree arc. For example, between N and 30 degrees there is a click at N, 10, 15, 20 and 30 degrees. You can therefore set the bezel exactly to bearings such as 15° or 45°. A very intelligent feature and some very nice attention to detail by Suunto.

          To the outside of the bezel is a small triangular pointer. Move the bezel so that the pointer is on your desired bearing. Align the needle with “N” on the bezel and select a landmark in the direction the pointer indicates. A quick stroke of model paint makes this pointer even more distinctive.

          I’ve had my clipper many decades now. It is a model with a blue card. Some websites claim the letters on the card are luminous. Either this has worn off on my own example or it was a feature that was introduced on later models. The more modern examples have a black card. Some websites also list the clipper as being suitable for diving!
 

          One reason that I have used the clipper so often is that it is the compass that I always have with me. I have a small container, rather like a 35mm film container but oval in section. The clipper lives in this at the bottom of a belt pouch, sometimes sharing its accommodation with a couple of aspirin.

          If I am out in the wilds I will pack a larger compass. The clipper has proved most useful in environments where the need for a compass is often unanticipated. Many guidebooks will give you directions such as “the hostel can be found a few blocks northeast of the station”. There are a number of techniques that can be uses to determine direction in an urban environment but sometimes these cannot be used. The sky may be overcast or satellite dishes are not visible. This is when a compass like the clipper comes in very useful.

         If you have enjoyed this article or it has been helpful to you please feel free to show your appreciation. Thank you.
The Books

http://www.angelfire.com/art/enchanter/epsdbook.html
http://www.lulu.com/shop/http://www.lulu.com/shop/phil-west/survival-weapons-optimizing-your-arsenal/paperback/product-21488758.html
http://www.lulu.com/shop/phil-west/crash-combat/paperback/product-22603842.html
https://www.amazon.com/Anatopismo-Underrealm-Novella-Phil-West-ebook/dp/B077G7MMFM

Tuesday, 20 March 2018

Seven tools of EDC.

Today, as I was coming into work I was thinking about “magic number seven”. In short, this is an observation that the average number of related “data chunks” a person can recall is seven, plus or minus two. This is usually specified as for short term memory, but may be relevant to longer term memorization of lists too.

A friend of mine is working on a language-related project. It seemed to me that if you must have lists of categories or affixes then breaking them up into groupings of seven or less might be a good approach.

As it is wont to do, my mind drifted and I began to think about the ninja “six tools of travelling”. I know six is not seven, but bear with me a moment. I remember this list by recalling that three things on it are “flexible”: hat, rope, “towel”; and that three are not: medicine, writing kit and fire tube. As I point out in my earlier article, this list does not include a knife, since telling a ninja or any other sensible person of that era to carry one was probably redundant. If we add knife/ tool to the list it becomes seven.

Ok, I thought, does what I have on me right now meet the criteria of the six/ seven tools of travelling/ everyday carry (EDC)?
  • Firstly, I have a hat. It’s cold out and my head has little remaining natural insulation. If it was sunny out and I was planning to spend any time outside I would probably have a hat of a different design.
  • Rope, or cordage at least. I have a spare shoelace tucked into the bottom of a pocket. I also have the dental floss in my pocket kit which can be used for a variety of purposes.
  • “Towel”. The item the ninja regarded as a towel was a relatively thin, multipurpose item. I have a bandana in my pocket which can serve similar purposes, including as an emergency hat.
  • Medicine. My pocket kit contains plasters, painkillers and disinfectant wipes.
  • Writing kit. I have a pencil. I can also write things down on my phone.
  • Fire. No ninja tube of smouldering charcloth, but I do carry a source of fire. A lighter rides in the same pocket as the bandana and shoelace.
  • Knife. I carry a Swiss army knife and a mini-Leatherman squirt and have a Swiss army classic mini-knife on my key ring.
These seven tools do not just represent concrete objects. They also represent broader, more generic categories. For example, the hat also represents shelter, so includes a coat suited to the weather, scarf and gloves should they be needed and the survival blanket I carry. The writing kit also represents communication, so includes my phone and the USB drive I carry. Communication can include signalling, which includes my phone and the whistle and photon light on my keychain. Illumination can be taken as a subset of signalling. The knife also represents tools in the narrower sense, so includes my mini-prybar, diamond sharpening card and the P38-style can opener on the keychain. The knife also represents the requirement for self-defence, where such is permitted.
As can be seen, the “seven tools of EDC” are a good starting point for planning an EDC or larger kit. There are other categories, of course. Money is always useful and documentation may be needed. I carry tape, pins and other items that might be used for repairs. These might be considered a subset of the knife/ tools category. I may add a magnetized needle and a few feet of invisible thread to my little bag of pins and paperclips. None of the seven categories really covers navigation but I do carry a Suunto clipper compass which has proved to be surprisingly useful in town. On the next level up food and water, or the means to procure and prepare them should be addressed. At the EDC level this is addressed by the money and credit card. If you live in a very hot, dry environment carrying a supply of water on your person is prudent.
 
If you have enjoyed this article or it has been helpful to you please feel free to show your appreciation. Thank you.
The Books

http://www.angelfire.com/art/enchanter/epsdbook.html
http://www.lulu.com/shop/http://www.lulu.com/shop/phil-west/survival-weapons-optimizing-your-arsenal/paperback/product-21488758.html
http://www.lulu.com/shop/phil-west/crash-combat/paperback/product-22603842.html
https://www.amazon.com/Anatopismo-Underrealm-Novella-Phil-West-ebook/dp/B077G7MMFM

Wednesday, 23 November 2016

The Engineer's Compass.


           Probably the oldest compass I have is an “engineer’s compass” similar to that in the photo below. These can be found at very modest prices so I suspect a number of readers might have one lying around.
 

           I acquired mine a long time ago. So long ago, in fact, that it predated the internet and I had very little idea as to how to use it. Books and magazine articles on compass use concentrated on baseplate compasses such as the Silva and Suunto brands. What were all these wires and notches and tiny magnifiers for?

           I had to work out how to use it myself. The method I came up with involved tilting both the cover and the lens bracket inwards so that they just made contact. I could look past the wire through the notch on the lens bracket. I could read the value off the dial using the lens. The gentleman in the photo below seems to have made the same conclusion.


           Nowadays there are a wealth of websites and online manuals on how to use a lensatic compass. I wasn’t quite right, but I was not that far wrong either.

           The lens bracket should be tilted inwards. By experimenting with the angle you can improve your image of the dial. According to most manuals the cover should be vertical for using the sighting wire. You will find, however, that if you incline the cover inwards it casts a shadow over the compass and the reflection of the wire allows you to read the value on the dial through the lens more accurately.
The Books
http://www.angelfire.com/art/enchanter/epsdbook.html 

http://www.lulu.com/shop/http://www.lulu.com/shop/phil-west/survival-weapons-optimizing-your-arsenal/paperback/product-21488758.html

http://www.lulu.com/shop/phil-west/crash-combat/paperback/product-22603842.html


Tuesday, 15 November 2016

Italian Army Style Lensatic Compass


         A friend of mine brought the “Italian Army Style Lensatic Compass” to my attention. I have a bit of a thing for interesting compasses so decided to treat myself. Being on a limited budget this is probably a copy rather than the actual issue model. This will be a relatively modest review since it only arrived last night.


         The first thing that you notice, even before it is out the box, is the weight. My electronic balance tells me the compass weighs 290g or 10¼ oz. The box has the company names of “Sturm” and “Mil-tec” and the text outside is a mixture of English and German but, ironically, no Italian!


         The compass itself is an interesting mixture of familiar and novel features. Like the US lensatic compass the cover is raised to the vertical for taking bearings of terrain features. Opened fully it can be used on a map as a 15cm ruler. The other side is a 1:25000 scale, which corresponds to 4cm per kilometre. This scale is marked in thousands of metres, in 10 metre increments.


        The most obvious of the novel features is the clinometer, a black plate that folds over the compass dial. The clinometer has two scales, one marked in degrees and the other in percentage gradient. According to the manual the clinometer pointer has a lock to stop it swinging about. This appears to be that if you push it just past the fully vertical position it will stay there by friction.

         The other novel feature is the eyepiece near the lanyard ring. With many lensatic or engineer’s compasses there is a lens that you fold up and use to look at the far side of the compass dial. In this model the viewer is built into the compass body. The eyepiece can be adjusted to compensate for discrepancies of vision. This system gives a really good view of the compass dial. The view is magnified so it is very simple to distinguish the single degree increments of the dial. The bearing is in black and the backbearing is printed above in red. All very clear and easy to read. I really like this feature!

         The cover has a large clear window with various markings. One part appears to be designed to serve as a map detail magnifier. Just above the eyepiece is a fine notch that can be used to align the sighting line on the cover. This has a “pinhole camera” effect that brings the line into sharp focus. You eye easily moves from the sighting notch to the eyepiece below so bearings can easily be taken. Very well thought out and executed!

         The base also incorporates a bull’s eye spirit level, a feature I’ve not found on my other compasses.

         One surprise was that the compass bezel did not appear to rotate. Perhaps I am too used to Silva and Suunto designs, I mused. This part seemed quite solid. But why knurl the edges if it was not intended to rotate? Why bother printing it with a degree scale and etching reference marks on the glass surface? The image in the manual labels the bezel as a “pivoting dial” and this is listed in the features on the side of the box as “rotating compass ring”. Turns out (pun intended!) that the bezel does rotate but it is initially very firm. Persist with it and it will begin to work as intended. A word of caution, however. The bezel is marked in tens of degrees so “3” = 30 degrees and “30” =300. Setting the bezel helps you keep on the intended bearing. I’ll not bother describing how this is done in this post since the method will be familiar to many readers already. A future post will cover compass techniques.

         The compass came with a small but comprehensive instruction booklet. The appeared to be all in German but halfway through the text was repeated in English. This section was actually titled “Englishch” which was not promising. In fact the translation isn’t as bad as I feared! The first few paragraphs cover the obvious basics. How to take a bearing, using the compass with a map and how to move on a bearing. Then there are instructions on using the clinometer.

         The manual also includes a table. The first three columns are for converting between degrees, milliradians and grads (does anyone still use grads?). The fourth column is a % scale and the fifth column is fractions derived from height divided by distance.

         The manual then gives information on how this table can be used to determine features such as object height at a known distance, or distance from an object of known size. All this is done without the need for trigonometry tables. I will describe this in greater depth when I have had opportunity to scan the table and some related sections.

         The compass has one final trick under its skirt. If you flip it over you will find the table in the manual is reproduced on the bottom of the baseplate. The columns are even labelled in Italian! On the downside the font of this table is very small, and consists of black raised letters on a black background. It may be a good idea to copy the table in the manual and laminate it.

         The compass is a bit on the heavy side, so if you love ultra-light gear this is not the model for you! The hinge between the base and cover seems rather slim so I will have to see if this loosens up or gives other problems. Because of the way it is orientated the clinometer will be at its most accurate if one person sights while another stands beside to read the scale. I think this is a very good compass for the price. It is certainly easy to use and I love the magnified and adjustable viewer.
 
The Books
         If you have enjoyed this article or it has been helpful to you please feel free to show your appreciation. Thank you.
The Books

http://www.angelfire.com/art/enchanter/epsdbook.html
http://www.lulu.com/shop/http://www.lulu.com/shop/phil-west/survival-weapons-optimizing-your-arsenal/paperback/product-21488758.html
http://www.lulu.com/shop/phil-west/crash-combat/paperback/product-22603842.html
https://www.amazon.com/Anatopismo-Underrealm-Novella-Phil-West-ebook/dp/B077G7MMFM

Saturday, 22 August 2015

Are You Ready to Go?

            Here is a question to ponder over this weekend : Are you ready to go?
 

            Suppose, you are told at short notice that you need to go camping, leave the country or evacuate before the zombie swarm reaches you. How organised are you? How effectively can you lay your hands on things you might need?
             Regular readers will know that recently I had to prepare for a trip abroad on very short notice. This was relatively painless since most of the things I needed were already packed in my big black rucksac. I didn’t take that rucksac on this trip, but it was useful that I just had to reach into one pocket for my washkit, another for the medical kit and so forth. Even some of my “holiday clothing” was stored in this pack. (We will, of course, ignore the fact that at first I could not find this rucksac because I had forgotten I had stored it in my flatmate’s room!)
             My girlfriend wanted to borrow a tent for a girls-only camping trip the other weekend. All my tents and sleeping bags are on top of a wardrobe and easily accessed. My preferred “SHTF” kukri is already mounted on a belt along with a Puuko utility knife.
             On the other hand, last night I was looking for a mess kit and stove I wanted to show someone and this involved digging at the bottom of a cupboard for ten minutes. All the bits of the kit were together and I had a supply of fuel readily to hand to fill the fuel bottle, but was this kit truly “ready to go?” Not really! The interior should have had a brew kit, some Oxo cubes and a couple of blocks of instant noodles. The kitchen cupboard was also deficient of these items. I really should keep more food in the home for emergencies!
             This weekend I want readers to think about their level of preparedness and how easily they can gather necessities together at short notice. The useful tool of “Uncle Phil’s list” can be used to give us some guidelines here.


Uncle Phil’s List, with comments.
1) Shelter.
             If you own more than one tent, store them together and ensure each packed tent has sufficient pegs, poles and lines, with spares as necessary. When you buy a tent is often comes in just one bag. It is often prudent to place the inner and outer in separate bags and/or carry the poles separately. Place all the components in a larger storage bag or devise some other means that ensures components of different tents do not get mixed up.
              Other shelter items such as basha sheets, bivibags and such are probably best stored with the tents. You can thus choose the shelter best suited to expected conditions.
Emergency shelter items such as survival bags may already be packed in rucksacs or emergency kits. Similarly you might choose to keep one tent in your car or with your bike.

2) Sleeping.
               Sleeping bags, sleeping bag liners, kipmats, blankets and related items should probably be stored with your tents. When not travelling sleeping bags should not be stored in their stuffsacs. Keep the stuffsacs close to the bags so they can be quickly packed when needed. Some of my stuffsacs are tied to loops on the appropriate sleeping bag. My tents live on top of a wardrobe along with several of my larger rucksacs. The sleeping bags are laid over the top of these.


3) Clothing.
               I will admit that my clothing needs to be better organised. My summer and winter hiking boots are at the bottom of the wardrobe. Easily located but may take some digging out. Not being a total idiot I have tied the laces together so if I find one I can soon find its sibling.
             To prepare for a quick bug-out you should probably have a set of clothes suitable for rough travelling stored with your boots. Don’t forget warm items, waterproofs, gloves and hats. You will need a hat suitable for sun and one for colder weather. A boonie hat, headover and some bandanas or keffiyeh are ideal. Some of my wet weather items live permanently in various rucksacs or daysacs.


4) Fire.
               My emergency kit/pouch contains several ways to make fire, including a source of tinder (Vaseline-soaked cotton wool). Many of my packs or daysacs have a disposable lighter tucked into a pocket. A lighter should also be in a pocket of your bug-out clothing.


5) Water.
               My larger Platypus bottle with the drinking tube either lives in my black daysac or the big black holiday rucksac. Various plastic bottles (ex-soda bottles) live in other packs. My emergency kit/pouch holds water purification tablets and a plastic bag that can be used to carry and sterilize water. There is room for improvement here. My canteen cup was hibernating in a bag of miscellaneous outdoor items! I need to organise something where my cooking utensils are all gathered together and more readily accessible.
               Activities such as camping may require items such as a folding bowl or larger volume water storage.


6) Food.
             I should really keep more food in the house! I injured my back recently and could not leave the house for several days. I need to stock up on dry goods. I don’t generally eat tinned food but I should really have some in the cupboard for emergencies.


7) Hunting and Fishing.
             Means for hunting, trapping and fishing are included in the emergency kit/pouch. Actually having some food I can carry out with me would be more practical!


8) Cooking Equipment.
             Over the years I have acquired a variety of mess kits, camping cookware and stoves. I need to gather these together in one place so that I can easily choose the items most suited to the anticipated journey.


9) Medical and First Aid items.
             My main travel medical kit sits ready in a pocket of the big black rucksac so is easily located. I should probably make sure that my suncream and insect repellant are in the same pocket. They currently ride in another pocket of that pack. My personal medications are in my bedroom so an appropriate supply can be gathered at short notice. The emergency kit/pouch contains some additional medical supplies. Some of my other rucksacs contain more basic medical kits (ie, plasters, alcohol wipes and painkillers).


10) Tools.
             I have lots of these, and I really need to separate the genuine working items from the various curios and collectables. As mentioned already, my field kukri and a companion knife are already on a belt in the same cupboard that stores a big chunk of my other gear. The machete, golok and entrenching tools should probably join these. Blades should be sharp and ready for use. Other tools such as my telescopic walking poles should also be here. Some items such as the penknife and mini-leatherman are always on my person.


11) Navigation.
             My best compass is with my emergency kit/pouch. It actually has its own pouch attached to the belt of the main pouch. A small Suunto clipper compass is always with my penknife and mini-leatherman. If you have any other compasses distribute them to useful locations such as the pocket of your bug-out clothing or in the pack you usually use for hiking. A map or street atlas of the local area is not a bad idea.


12) Signalling.
             A compact whistle rides on my keyring. The emergency kit compass mentioned above has a plastic whistle on its lanyard. One of my daysacs includes a little gizmo that combines a whistle, magnifier, compass, LED light, mirror and thermometer. Got it from a 99p store and it mainly serves as the tag of a zipper, but it has the potential to be a useful spare. Any spare whistles can be added to other packs or attached to your bug-out clothing.
             I guess the category of signalling these days also includes mobile phones. Most of you will count this as an item you always have with you. Hopefully you are not one of the people that seems incapable of going more than two minutes without it in your hand! Your travelling kit may need provision to keep your phone charged. I have one of those handcrank gizmos but the lead does not fit modern phones. There may be more up to date versions available. Your phone charger may be an item in everyday use. Make a note on your travel checklist so you do not forget to pack it.
             In some parts of the world signal gear may mean CD radios, satellite phones or pyrotechnics. The first two will require charged batteries or means to charge them.


13) Light.
             No matter how civilized the location of your trip may be take a light source. It is amazing how readily useful items such as room keys find nice dark places to hide! My keyring always has a Photon II LED on it. Several of my packs have torches in them. My mini-maglight got lost in the tent fire at Leeds Festival. I now have a couple of the Chinese-made hand crank LED flashlights. While not as robust as “survival flashlights” their ability to hold a charge is impressive and I don’t need to worry about dead batteries. If you do opt of a battery powered design either store it with the batteries separate or block one contact with folded paper. Even with this precaution, check occasionally for signs of corrosion.
             Larger or more specialised light sources should be stored with your tools so you can readily select them. This includes candles and nightlights, useful for camping in the darker months.


14) Toiletries/Wash kit.
             I will describe the contents and rationale of my washkit and related items in a future post. These occupy a pocket in the big black rucksac so are easily located when needed. Deodorant is usually an everyday item so it is easy to overlook packing this in the rush to get going. Make a note on your checklist or buy a stick to ride in your kit permanently.
             A roll of toilet roll has its own plastic bag to keep it dry. This item is duplicated in some of my daysacs. Numerous uses including blowing your nose and as tinder.


15) Documentation: Passport, Visa, Books, Tickets, Money and Writing material.
             Some trips will need visas, passports, healthcare entitlement forms, tickets, boarding passes and foreign currency. You may want something to read too and I like to travel with a notebook. As always, make sure this items are organised so they can be readily located.
 Some of these items will need to be checked or prepared in advance, which brings me to another point. Make yourself a checklist and use it! It is easy to overlook something or take something for granted. Use your checklist and refine it with experience.


16) Rope and Cordage.
             The emergency kit/pouch has a hank of paracord created as described here. I usually put a hank of string or even a whole ball into a pack for more mundane tasks.


17) Repairs : sewing kit, tape, glue, spares.
             The sewing kit is a component of the emergency kit/pouch. On my recent trip space considerations prevented me taking the full emergency kit so I added the sewing kit to my medical kit. A small plastic bag contains more general spares such as rucksac buckles, electrical tape and superglue.


18) Specialist items.
             What these will be will depend on your intended trip. It includes defensive weapons, climbing gear, cameras, gift for hosts etc.


19) Packs.
             Now that you have decided what to take, you need to decide how to carry it. As you will have already gathered, most of my packs are all in the same place so I can choose which is most appropriate.


The Books
http://www.angelfire.com/art/enchanter/epsdbook.html 
http://www.lulu.com/shop/http://www.lulu.com/shop/phil-west/survival-weapons-optimizing-your-arsenal/paperback/product-21488758.html

Wednesday, 8 April 2020

Around The World In 30 Litres.

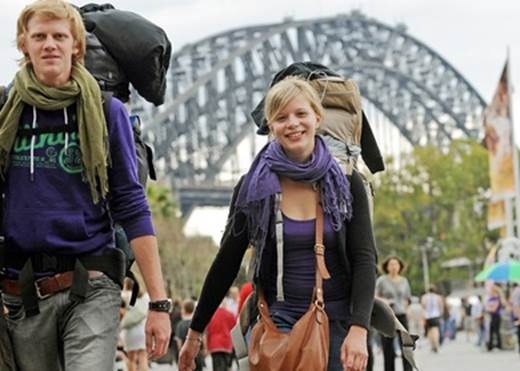
Decades ago I wrote a piece called something like “Travelling the World with a 30 Litre Pack”. This was so long ago it was on a floppy disc and it only ever got read as a print-out. That article is long since lost, but the experiences that contributed to it has also fueled many of the articles on this blog. I was asked if I could attempt to reproduce the article, since much of it is still relevant to travelers today. 

Firstly, I will point out this was not intended for wilderness expeditions or camping trips, but for holidays in areas where youth hostels or similar accommodation was available. On the trips where I expected to also do some camping, I carried a larger pack and more gear. Thinking back, I never personally made any of my trips with just a 30 litre pack. My daysac was smaller, and I already owned several larger packs. Money was often tight so I never got around to buying myself a nice 30. That said, one of the people who read the original article was inspired to spent nearly a month traveling around India with just a small pack.
One advantage of a larger pack is that you can carry a packed daysac inside it, which saves a lot of unpacking and packing when you want to dump the gear you don’t need for a few hours of sightseeing.
One of the products of my travels was “Uncle Phil’s List”, so I will use its categories for the following description.

The first category was “shelter”, which divides into shelter, sleeping and clothing.
Accommodation was in hostels or budget accommodation. The former were preferred for their social aspect, and I have many fine memories from such stays. The only thing I needed to carry for shelter was a credit card and a YHA membership card.
My daysac carried (and still has) an all-weather blanket, which over the years has been put to many uses. 

Many youth hostels do insist you have a sleeping bag liner. Mine got accidentally placed in the laundry on my last day at a hostel. My current one was sewn from the sheets the apologetic warden offered me as replacement. The top of the bag has some very distinctive cloth added to the top, to avoid this happening again. If I have to unpack in the dark the texture helps me orientate the bag. There are silk liners, which look really nice, but again, I have never been able to justify the expense.
I also carried a Merlin Softie one-season sleeping bag. This packs to the size of a rugby ball without using compression straps. Very useful when the bedding provided was not up to standard, or when I had to sleep on a bus, train or ferry on an overnight journey. Overnight trips were a useful trick when traveling on a tight budget. Saved on a night’s accommodation and got you to a new place to see. 

Careful selection of clothing can save you lots of weight. I encountered travelers who were carrying 20+ kg of clothes!
The trick is to select items that were easy to hand-wash, and just as importantly, quick to dry. I was fortunate that about the time I began traveling there were lots of reasonably priced silk shirts on sale. My basic travel wardrobe was two long-sleeved silk shirts and two short-sleeved. Theoretically, if it was cold I could have wore a short-sleeve under a long, but don’t ever recall this need arising. Denmark was a little chilly, so I brought a thin woolen jumper to supplement my usual gear. I did not know about ranger rolling back then. I could probably have packed things even smaller.
Underwear was three pairs of black swimming shorts, the sort with pockets and inner liners. If the day was hot I could easily remove my trousers and be already in shorts. Due to the odd climate inside airliners, for the flight out I found cotton underpants more comfortable. These would probably not be worn again until the flight back. I might wear a cotton tee-shirt for the flights instead of the silks. More commonly, I wore a casual cotton shirt that served as a light jacket for the rest of the trip.
The markets no longer seem to have reasonably priced silk shirts so as mine have worn out I have replaced them with the newer microfibre synthetics.
Just before a trip I would treat myself to some new socks, usually white cotton sports socks. Three pairs of these would go in the bag and a fourth pair worn on the trip out. When I began to get pains in my legs when flying I added a pair of compression socks to my load-out.
I carried two pairs of trousers, basically a “wear and a spare”. Cargoes’ would be fine, although one of my pairs was “smarter”. On some trips I hooked up with friends I had made on other trips. This often involved a family dinner so being able to smarten-up was useful. At the airport I often needed my passport and boarding pass readily to hand, and the large thigh pockets of the cargo trousers was very useful for this.
Since I was carrying a pack, and sometimes had to deal with rough terrain, including cobbled streets within towns, ankle support was a priority. Most of my trips were to hotter climes, so footwear of choice was canvas hiking boots. Honourable mention goes to my Hi-Tech Sierras. I only wore these during holidays, but they did so many miles the soles were treadless by the time I had to retire them. I was most disappointed to discover the line had been discontinued. The Hi-Tech Trilogies I brought as replacement nearly crippled me. My tendons bled and my toes too, if I recall correctly. Brand new white cotton socks soaked in blood. I have a different set of canvas boots now. Unlike the Sierras these have gore-tex. You don’t need gore-tex for what I am using them for, but finding canvas boots without it no longer seemed to be possible. In addition to the boots I also carried a pair of espadrilles or kung-fu slippers. If you have been wearing boots all day it is nice to slip into these when you head into town looking for dinner and a beer.
An important item was a rainproof jacket, ideally a lightweight one that packed into its own pocket or small pouch. The latter quality was far more important than it being breathable or some wonder fabric. I discovered that breathable waterproofs have a finite life, and you get to know that time is up the hard way, during a rainstorm!
I carried a lightweight jacket of some synthetic material for some protection against the wind. One of these had a cotton liner which I replaced with one made from a silk shirt. I don’t recall using these jackets much. Often I would use my cotton shirt, fleece or rainproof. I carried a fleece for colder days and evenings. This had a more windproof outer than most fleeces, so was more practical for outerwear.
Clothing included a boonie hat for sun protection, and several bandannas, one in a trouser pocket, the others in the pack. I carried a pair of gloves, although seldom needed them in hot climates.
The secret to carrying so little clothing is being willing to clean it during your trip. You will notice that most of the items I carried are quick-drying materials such as synthetics or silk. The cotton socks are an obvious exception, but these dried pretty well in the climates I traveled in. In such conditions putting on slightly damp socks was not a health problem. 

The only laundry gear I carried was a small nail brush. The same soap I washed and shaved myself with served as detergent. Washing socks generally involved putting them over my hands and “washing my hands”. The brush worked well on collars. Often I would step into a shower wearing a silk shirt and clutching a bundle of other items to wash. Hang a silk shirt on a hanger and it dries without needing ironing. In fact, the same is true of cotton tee-shirts!
Moving on to other categories: I carry a lighter as part of my EDC, which covered the requirement for fire. My daysac carried a water-bottle, although this might be moved to the outer pocket of a larger pack if I was carrying one. On more recent trips this has been one of my Platypus bottles, often the larger one with a drinking tube. On some trips I simply brought a large bottle of soda in a local store, then used the bottle for water once the soda was drunk. For most of my trips you could trust the local tap-water, but I did acquire a cup device that chlorinated water passed through it. You might wise to include a bottle of purification tablets instead.
I was seldom anywhere where I could not purchase food. The times I was, a few hours hungry would not kill me. Thus I carried nothing to cook with on hosteling trips. The bag soon acquired some local foods such as fruit, salami, bread and cheese. I can still recall sitting outside the Parthenon, making a sandwich with my penknife and surrounded by feral cats sunning themselves. I learnt to carry a bag of boiled sweets (aka “hard candy”). These provided an energy boost when climbing hills: most sights to see seem to be up hills or high up! And I will admit that offering a sweet to a fellow traveler was a great ice-breaker and gained me some very memorable companions over the years.
My travel medical kit I have described elsewhere. Medication appears in my current load-out, but I did not need such things in my younger days! My daysac included a bottle of sunscreen and one of insect repellent. These days you will have to ensure that the volumes of these are less than 100mls if you intend to travel by air. Another item for your daysac is a roll of toilet paper in a plastic bag. Over the years I refined and optimized my wash kit. This is described here.
My tiny sewing kit has seen a lot of use over the years, so is something it would be very foolish not to carry. My “spares and repairs” includes a couple of spare rucksac buckles, electrical tape, string and a tube of superglue.
Documents included my passport and any visa needed. Plane tickets: no e-tickets on smart phones back then! In Europe I carried the E111 medical treatment form, but these may no longer be valid. A zipped pouch such as a pencil case proved very useful to hold documents and other miscellaneous items. Traveler cheques, although I doubt modern travelers carry these. A photocopy of my passport, and record of the traveler cheque numbers went in the pencil case. I did have my cheques stolen on one trip, and got all my money back, since I had the numbers to cancel them. Wisely, I carried my credit card in a different place so that was not stolen. A couple of guide books, usually borrowed from the local library at home. Have more than one, since entries can be misleading or inaccurate. A phrasebook. A novel or similar to read while waiting for trains or just sitting in the sun. A notepad in a plastic bag, and something to write with.
I carried my penknife on my person, and often it has proved useful. My daysac included a flashlight of some form, in an outside pocket so it was readily accessible. A telescopic hiking pole was a blessing on steep terrain or when tired.
One of the first things I would do when reaching a new town was locate the tourist office and acquire any street maps they had. My EDC includes a Suunto Clipper compass and this has often proved useful when navigating a strange town. 
An item conspicuously absent from my original article was a mobile phone. They were only just coming in, they needed frequent recharging, and you were unlikely to find facilities to charge them, back then. My trips were an escape, so I made a point of leaving all my electronic devices at home, which probably would have been a Walkman back then! Not really being a photographer, I also never bothered carrying a camera.
Few backpacks are totally waterproof, so the contents should be in one or more plastic bags. These needn’t be anything expensive, just intact. If you are traveling with just one pack I suggest you divide the contents with at least two bags. One bag holds your bedding, wash-kit and most of your clothing. The other bag has the items you may need during a day’s sightseeing: medical kit, guide books, raincoat etc.

If you have enjoyed this article or it has been helpful to you please feel free to show your appreciation. Thank you.

http://www.angelfire.com/art/enchanter/epsdbook.html
http://www.lulu.com/shop/http://www.lulu.com/shop/phil-west/survival-weapons-optimizing-your-arsenal/paperback/product-21488758.html
http://www.lulu.com/shop/phil-west/crash-combat/paperback/product-22603842.html
https://www.amazon.com/Anatopismo-Underrealm-Novella-Phil-West-ebook/dp/B077G7MMFM
https://www.amazon.com/Hell-Ay-non-partisan-sourcebook-role-play-system-ebook/dp/B07FQSHSQC